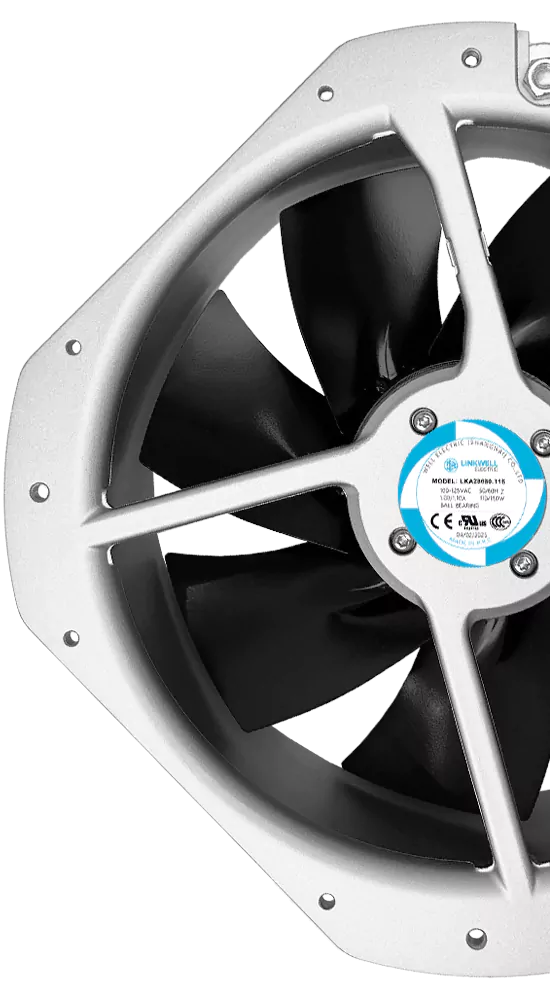
When you build electrical enclosures, you want them to last. Adding a fan helps keep everything cool and safe. A cabinet fan brings in fresh air and removes hot air. This cooling stops things from getting too hot and is essential for understanding how to install cabinet fan units effectively. It helps your system work for a longer time. Forced ventilation moves air inside the cabinet and guides where the cool air goes. You will see better airflow and fewer problems. If you want to install cabinet fan units, remember this: cooling is very important for good performance.
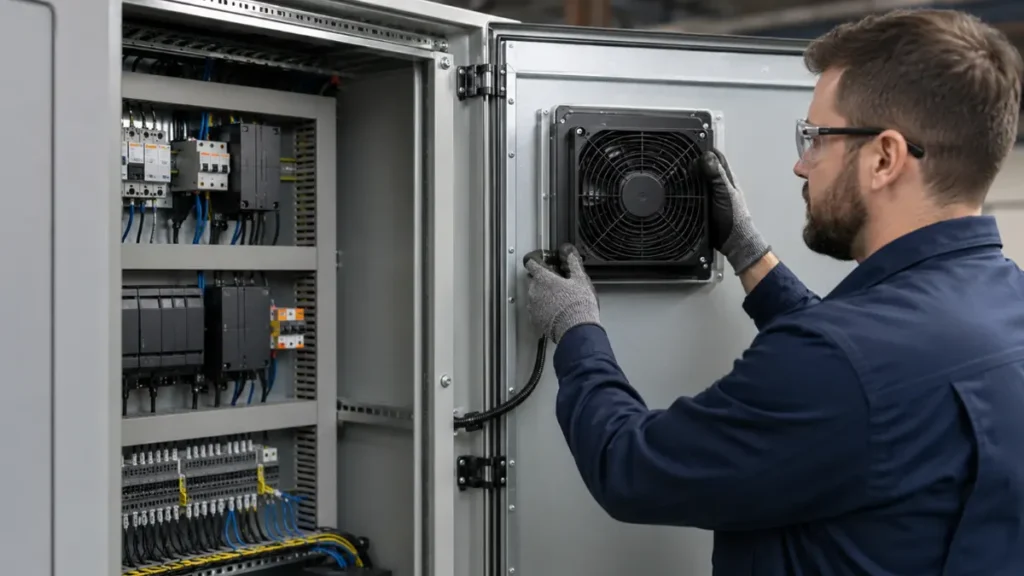
Key Takeaways
- Good airflow is very important for electrical enclosures. It keeps them cool and safe. It stops them from getting too hot. It also helps the equipment last longer.
- Get tools like a drill, screwdriver, and measuring tape before you start. Being ready with tools makes the job easier.
- Always turn off the power before you work on electrical enclosures. This is very important for your safety.
- Put filters on intake vents to block dust. Clean or change these filters often to keep air moving well.
- Put the intake fan at the bottom. Put the exhaust fan at the top. This uses natural airflow to cool the enclosure better.
- Check which way the fan blows air before you put it in. Putting it the right way helps cool the enclosure well.
- Pick a fan size that fits your cabinet’s size and heat. If the fan is too small, things can get too hot.
- Check your setup often. Look for dust and make sure all seals are tight. This keeps the cooling working well.
Tools and Materials
Before you start installing a cabinet fan, you need to gather the right tools and materials. Having everything ready makes the job easier and safer. Let’s break down what you’ll need.
Essential Tools
You can’t install a cabinet fan without the proper tools. Here’s a list to help you get started:
- Drill: You’ll use this to make holes for mounting the fan and vents.
- Hole Saw or Jigsaw: These help you cut out the vent holes in the cabinet.
- Screwdriver: You need this to secure the fan and any covers.
- Measuring Tape: This tool helps you mark the right spots for holes.
- Marker or Pencil: You’ll use this to mark where you want to cut or drill.
- Wire Stripper: If you need to connect wires, this tool makes it easy.
- Level: This keeps your fan straight and neat.
- Safety Glasses: Protect your eyes from dust and debris.
- Gloves: Keep your hands safe while cutting and handling sharp parts.
Tip: Always check your tools before you start. Make sure they work and are safe to use.
Required Materials
You need more than just tools. Here are the materials you’ll need for a basic cabinet fan installation:
- Cabinet Cooling Fan: Choose the right size and type for your enclosure.
- Mounting Screws or Bolts: These hold the fan in place.
- Fan Gasket or Seal: This stops air leaks and keeps dust out.
- Electrical Wires: You’ll need these to connect the fan to power.
- Wire Connectors: These make wiring safe and tidy.
- Filters: If you want to keep dust out, you’ll need filters.
- Cable Ties: These help organize wires inside the cabinet.
- Grounding Wire: This keeps your installation safe from electrical faults.
Here’s a quick table to help you check your materials:
| Material | Purpose |
|---|---|
| Cooling Fan | Moves air |
| Screws/Bolts | Secures fan |
| Gasket/Seal | Prevents leaks |
| Electrical Wires | Powers the fan |
| Filters | Blocks dust |
| Wire Connectors | Safe wiring |
| Cable Ties | Organizes wires |
| Grounding Wire | Safety |
Optional Accessories
You can make your cabinet fan installation even better with some optional accessories. These aren’t always needed, but they help with dust control and safety.
- Filtered Vents: These keep dust out while letting air flow.
- Fan Grills or Covers: Protect the fan and stop fingers or objects from getting inside.
- Thermostat Controller: This turns the fan on and off based on temperature.
- Noise Dampening Pads: These reduce vibration and noise.
- LED Indicator Lights: Show you when the fan is running.
Note: If your cabinet sits in a dusty area, filtered vents and grills are a smart choice. They help keep your equipment clean and safe.
Now you’re ready to gather your tools and materials. With everything in place, you can move on to the next step and start your cabinet fan installation.
Safety Precautions
When you install a cabinet fan, safety comes first. You want to protect yourself and your equipment. Let’s look at the most important steps you should follow.
Power Isolation
Before you touch anything inside the electrical enclosure, turn off the power. You should always isolate the power source. This step keeps you safe from electric shock. Find the main breaker or disconnect switch. Flip it off. Use a lockout tag if you have one. This tag tells others not to turn the power back on while you work. Double-check that the power is off with a voltage tester. Never skip this step. It only takes a minute, but it can save your life.
Tip: Always let others know you are working on the enclosure. Communication helps prevent accidents.
PPE
Personal Protective Equipment, or PPE, keeps you safe from harm. You should wear safety glasses to protect your eyes from flying dust or metal. Gloves keep your hands safe from sharp edges. If you work in a place with arc flash risks, wear an arc flash-resistant jacket and insulated gloves. These items protect you from burns and shocks. You might also need ear protection if you use loud tools. Always check your PPE before you start. Make sure everything fits well and has no damage.
Here’s a quick checklist for PPE:
- Safety glasses
- Insulated gloves
- Arc flash-resistant jacket (for high-risk areas)
- Ear protection (if needed)
- Dust mask (if you expect a lot of dust)
Safe Handling
You should always handle tools and parts with care. Use both hands when lifting heavy fans or covers. Place tools on a stable surface. Avoid working in high-vibration areas. Secure the fan and all hardware tightly. Loose parts can cause noise or even fall off. Make sure the cabinet cooling system meets or exceeds the NEMA rating for your enclosure. This rating tells you the enclosure can handle the environment. If you install the fan in a hazardous location, follow all safety rules. This step helps prevent fire or explosion risks.
You need good ventilation during installation. Open windows or use fans to keep fresh air moving. Proper ventilation helps remove dust and fumes. It also keeps you comfortable while you work. You should check the enclosure for dust before you start. Clean out any buildup. Good ventilation keeps your equipment cool and prevents overheating. After you finish, inspect your work. Make sure all wires are neat and secure. Regular inspections and maintenance help prevent electrical faults.
Note: Only trained professionals should handle electrical enclosures. If you feel unsure, ask for help from someone with experience.
You can keep your project safe and smooth by following these safety precautions. Good ventilation, the right PPE, and careful handling make all the difference.
Ventilation and Dust Control
You want your electrical enclosure to stay cool and clean. Good ventilation and dust control help you reach that goal. When you install a cabinet fan, you create a path for air to move. This airflow removes heat and keeps your equipment safe. Dust can sneak in with the air, though. If you ignore dust, it can build up and cause problems.
Let’s talk about why you need to care about dust. Dust can block vents and fans. It can cover circuit boards and wires. Over time, dust makes your equipment run hotter. It can even cause short circuits or fire risks. You don’t want that. You want your enclosure to last and work well.
Here’s what you can do to control dust and improve ventilation:
- Use Filters: Place dust filters on intake vents. These filters catch dust before it enters the cabinet. Clean or replace them often.
- Install Fan Grills: Fan grills protect the fan and stop large debris from getting inside. They also keep fingers safe.
- Seal Gaps: Check for gaps around the fan and vents. Use gaskets or foam tape to seal these spaces. This step keeps unfiltered air out.
- Clean Regularly: Wipe down the inside of the enclosure. Remove dust from fans, vents, and surfaces. A clean cabinet works better.
- Choose the Right Location: Place your enclosure away from dusty areas if you can. High-traffic spots or workshops create more dust.
Tip: If you see dust building up on the outside of your enclosure, check the filters right away. A clogged filter means less airflow and more heat.
You can use this simple table to help you remember what to check:
| Task | How Often |
|---|---|
| Clean filters | Every month |
| Wipe surfaces | Every month |
| Inspect seals | Every 3 months |
| Check fan grills | Every 6 months |
You might wonder if you need filtered vents. If your enclosure sits in a dusty warehouse or near machines, filtered vents are a smart choice. They keep your equipment safe and reduce cleaning time.
Don’t forget about airflow. You want air to move in and out without hitting obstacles. Keep wires and tools away from vents. Make sure nothing blocks the fan. Good airflow means better cooling and less dust buildup.
You can keep your electrical enclosure safe and reliable. Just pay attention to ventilation and dust control. A little effort now saves you time and trouble later.
How to Install Cabinet Fan
Marking Intake and Exhaust Holes
You want your cabinet fan to work well, so start by marking where you’ll put the intake and exhaust holes. This is one of the most important fan installation steps. First, look at your electrical enclosure and find the best spots for airflow. Most people place the air intake hole near the bottom or front of the cabinet. The exhaust hole usually goes at the top or rear. This setup lets cool air come in and pushes hot air out.
Grab your measuring tape and marker. Measure the size of your fan and use the template that comes with it, if you have one. Place the template on the cabinet where you want the intake or exhaust. Trace around it with your marker. Double-check your marks to make sure they line up with the fan’s mounting holes. If you get this step right, the rest of the installation in cabinet will go much smoother.
Tip: Mark both the intake and exhaust holes before you start cutting. This helps you see the airflow path and avoid mistakes.
Cutting Vent Holes
Now you’re ready to cut the vent holes. This part of how to install cabinet fan units can get messy, so wear your safety glasses and gloves. Use a drill to make a starter hole inside your marked area. Then, grab your hole saw or jigsaw and carefully cut along the lines. Take your time and keep your hands steady. You want the holes to match the size of your fan for a snug fit.
After you finish cutting, use a file or sandpaper to smooth any rough edges. This keeps your hands safe and helps the fan sit flat against the cabinet. Clean up any metal shavings or dust before you move on. Good airflow starts with clean, well-cut holes.
Fan Placement and Direction
Getting the fan placement right is key to cooling. You want to create a straight path for air to move through the cabinet. Place the intake fan at the bottom or front. Put the exhaust fan at the top or rear. This setup uses natural airflow—cool air comes in low, hot air rises and exits high. It’s one of the best ways to enhance cooling effectiveness.
Here’s a simple list to help you remember the fan installation steps for airflow direction:
- Check your cabinet layout and find the hottest spots. You can use a thermal camera if you have one.
- Mark the intake hole at the bottom or front and the exhaust hole at the top or rear.
- Choose the right number and size of fans for your heat load.
- Spread out the fans if you have more than one. Place them near heat sources to keep everything cool.
Intake Fan at Bottom
The intake fan pulls cool air into the enclosure. Place it at the bottom or front of the cabinet. This spot lets the fan bring in fresh air where it’s needed most. Make sure nothing blocks the air intake. If you use a filter, install it over the intake hole before mounting the fan. This keeps dust out and helps your cooling system last longer.
Exhaust Fan at Top
The exhaust fan pushes hot air out of the cabinet. Mount it at the top or rear. Hot air rises, so this is the best place for the exhaust. Double-check the fan’s arrow or label to make sure it blows air out, not in. If you have more than one exhaust fan, space them out for even cooling. This step is important for every installation in cabinet projects.
Note: Always follow the arrows on the fan housing. They show the airflow direction. If you install the fan backward, you won’t get good cooling.
When you follow these steps, you set up a strong airflow path. Cool air comes in at the bottom, moves past your equipment, and exits as hot air at the top. This keeps your electrical enclosure safe and helps your system run longer.
Securing the Fan
Now that you have your holes cut and your placement marked, it’s time to secure the fan. This step keeps your fan steady and stops it from moving or rattling. Start by lining up the fan with the holes you made. Make sure the airflow direction matches your plan. Most fans have arrows on the side that show which way the air will move. Double-check these arrows before you attach anything.
Hold the fan in place and insert the mounting screws or bolts through the holes. Tighten them with a screwdriver. Don’t overtighten, or you might crack the fan housing. If your fan comes with a gasket or seal, put it between the fan and the cabinet. This helps stop air leaks and keeps dust out. If you use a filter, place it over the intake or exhaust before you secure the fan. A snug fit means better airflow and less vibration.
Tip: If your fan vibrates or makes noise after installation, check the screws and gasket. Sometimes, a loose screw or a missing seal can cause problems.
Installation in Cabinet: Step-by-Step
You want your cabinet fan installation to go smoothly. Follow these steps to get the best results:
Preparing Enclosure
First, clean the area where you’ll install the fan. Wipe away dust and debris. A clean surface helps the fan sit flat and keeps dirt out of your enclosure. Check for sharp edges around the holes. Use a file or sandpaper to smooth them out. This step protects your hands and the fan wires.
Mounting Hardware
Next, gather your mounting hardware. Most fans come with screws or bolts. If not, pick ones that fit the mounting holes and are long enough to hold the fan tight. Place the fan against the cabinet, line up the holes, and insert the screws. Tighten them evenly. If your fan has a gasket, make sure it sits between the fan and the cabinet. This seal keeps air moving in the right direction and blocks dust.
Wiring and Grounding
Now, connect the fan to power. Use wire strippers to remove a small section of insulation from each wire. Match the wires from the fan to the power supply. Use wire connectors to join them. Twist the connectors until they feel snug. If your fan needs grounding, attach the grounding wire to the cabinet or a grounding point. This step keeps your installation safe and prevents electrical faults.
Note: Always double-check your wiring before you turn the power back on. If you feel unsure, ask a professional for help.
Installing Filters or Grills
Finish your installation by adding filters or grills. Place a dust filter over the intake side of the fan. This filter catches dirt before it enters the cabinet. If you use a grill, snap or screw it over the fan. The grill protects the fan blades and keeps fingers safe. Clean or replace filters often to keep airflow strong.
Here’s a quick checklist for your cabinet fan installation:
- Clean the mounting area.
- Smooth sharp edges.
- Line up the fan and secure it with screws.
- Add a gasket or seal if needed.
- Connect the wires and ground the fan.
- Install filters or grills.
- Test the fan to make sure it runs and moves air in the right direction.
You can follow these steps for a safe and effective installation. A well-installed fan keeps your electrical enclosure cool and your equipment running longer.
Cabinet Cooling Fans: Selection
Fan Size and CFM
Choosing the right cabinet cooling fans starts with size and airflow. You want your cooling to match the needs of your enclosure. If you pick a fan that’s too small, your equipment might overheat. If you go too big, you waste energy and space.
Let’s talk about CFM. CFM stands for cubic feet per minute. It measures how much air moves through your cabinet. Higher CFM means faster ventilation and better cooling efficiency. To figure out what you need, grab your cabinet’s dimensions. Divide the volume by 1728 to get cubic feet. Multiply that number by three. This gives you a good estimate for real-world cooling, since electronics and heat sources can change airflow.
Here’s a quick way to check your needs:
- Small cabinets (under 10 cubic feet): Look for cabinet cooling fans with 30-50 CFM.
- Medium cabinets (10-30 cubic feet): Aim for 60-120 CFM.
- Large cabinets (over 30 cubic feet): Choose fans with 150 CFM or more.
You can adjust these numbers if your enclosure has lots of heat-generating devices. Always check the specs and make sure your cooling matches your setup.
Voltage and Type
You need to match the voltage and type of cabinet cooling fans to your power supply. Most fans come in AC or DC versions. AC fans usually run on 110V or 220V. DC fans often use 12V or 24V. Check your cabinet’s wiring before you buy. If you pick the wrong voltage, your fan won’t work or could get damaged.
Here’s a simple list to help you decide:
- AC fans: Good for standard electrical cabinets and easy wiring.
- DC fans: Better for battery-powered or mobile setups.
- Dual-voltage fans: Useful if you want flexibility or backup power.
Always check the label on your fan and your enclosure. Matching voltage keeps your cooling safe and reliable.
Filter and IP Rating
Filters and IP ratings help you protect your cabinet cooling fans and improve cooling efficiency. Filters block dust and debris. If your cabinet sits in a dusty area, you want a filter on the intake side. Clean or replace filters often to keep airflow strong.
IP ratings show how well your fan handles dust and water. You can use this table to pick the right protection:
| IP Rating | Protection Level | Common Fit | Typical Applications |
|---|---|---|---|
| IP44 | Basic splash and particle | Cleaner indoor equipment | Control cabinets, indoor electronics, protected automation |
| IP55 | Dust and water jet | Industrial, outdoor-adjacent | Telecom enclosures, outdoor cabinets, automation systems |
| IP68 | Dust-tight and waterproof | Harsh, water-exposed | Outdoor electronics, battery systems, waterproof projects |
If you work in a clean office, IP44 is fine. For factories or outdoor spots, IP55 or IP68 gives you better cooling and longer life. Always check your environment before you choose.
You can boost cooling efficiency by picking the right cabinet cooling fans, matching voltage, and using filters and IP-rated fans. This keeps your equipment safe and your cooling strong.
Noise and Temperature
When you pick a cabinet cooling fan, you need to think about noise and temperature. These two factors can change how your enclosure works and how comfortable your workspace feels.
Let’s start with noise. Every fan makes some sound. You might hear a soft hum or a loud whir, depending on the fan type. Some fans are quiet, while others can get noisy. If you work near the cabinet, loud fans can be distracting. Noise also affects the equipment inside. High noise levels, especially from blade passing frequencies, can stress your components and lower reliability.
Here’s a simple table to show typical noise levels:
| Fan Type | Noise Level (dB) |
|---|---|
| Blowers | 50 dB to 65 dB |
| Tube-axial Fans | 30 dB to 55 dB |
You can see that blowers are louder than tube-axial fans. If you want a quiet workspace, pick a fan with a lower dB rating.
Fan noise comes from two main sources:
- Blade passing frequency (BPF) creates sharp peaks in noise.
- Flow noise is about 10 dB lower than BPF.
You might notice that BPF stands out more than flow noise. If you need to keep things quiet, look for fans with smooth blades and good design.
Now, let’s talk about temperature. The heat inside your enclosure can change fast. If you have lots of devices or work in a hot place, your cabinet can get very warm. High temperatures can damage your equipment and shorten its life. You need a fan that can handle these changes.
Here are some real-world examples:
- In a glass factory, a sealed distribution box got very hot from both inside and outside heat. Even a small internal load needed active cooling because the conditions were so tough.
- In a dusty workshop, a filter-fan design led to high cabinet temperatures and lots of contamination. Switching to a closed-loop air conditioning system fixed the problem. Temperatures stayed stable, and maintenance became easier.
You should check your cabinet’s temperature often. If you see big changes or high readings, you might need a stronger fan or a different cooling system. Dust and dirt can make things worse, so filters help keep temperatures down.
Tip: If your cabinet sits in a noisy or hot area, choose a fan with low noise and high cooling power. This keeps your equipment safe and your workspace comfortable.
Noise and temperature matter when you select a cabinet cooling fan. Think about where your cabinet sits, how hot it gets, and how much sound you can handle. Pick the right fan, and you’ll get better cooling and quieter operation.
Airflow and Placement
Intake vs Exhaust
You want your electrical enclosure to stay cool and safe. The way you set up the intake and exhaust fans makes a big difference. Place the intake fan at the bottom or front of the cabinet. This spot lets cool air enter and flow over your equipment. The exhaust fan should go at the top or rear. Hot air rises, so this is the best place for it to leave the enclosure.
Think of it like a breeze moving through a room. Cool air comes in low, moves past everything, and warm air escapes up high. If you get the intake and exhaust right, you help your equipment last longer and work better.
Tip: Always check the arrows on your fans. They show which way the air will move. You want the intake to pull air in and the exhaust to push hot air out.
Airflow Path
A good airflow path keeps your enclosure from getting hot spots. You need to plan how air moves from the intake to the exhaust. Start by figuring out how much heat your equipment makes. Then, decide how much air you need to move to keep things cool.
Here’s a simple plan for setting up your airflow path:
- Calculate the heat load and how much air you need to move.
- Place the intake at the bottom or front and the exhaust at the top or rear.
- Make sure air passes over the electronics before it leaves.
- Use baffles or guides to direct air over the hottest parts.
- Add filters to the intake if your area is dusty.
You can also space out your components inside the cabinet. This helps air move around and stops hot spots from forming. Some people use special software to check how air moves, but you can do a lot just by planning your layout.
| Step | What to Do |
|---|---|
| Intake Placement | Bottom or front for cool air |
| Exhaust Placement | Top or rear for hot air |
| Airflow Direction | Guide air over electronics |
| Use of Filters | Add to intake in dusty places |
| Component Spacing | Leave space for air to move |
Avoiding Obstructions
Obstructions can ruin your airflow and make your fan work harder. You want to keep the path between the intake and exhaust as clear as possible. Wires, cables, and big parts can block air and create hot spots.
Here are some ways to avoid common problems:
- Keep cables neat and out of the airflow path. Use cable ties to bundle them.
- Don’t let large components sit right in front of the intake or exhaust.
- Use filters at the intake to stop dust from building up inside.
- Make sure all doors and panels seal tight. Gaps can let air escape and lower cooling.
- Test your setup after you finish. Check if the cabinet stays cool when everything runs.
Note: If your enclosure sits in a noisy area, pick fans that run quietly. You can also test your system under real conditions to make sure it works well.
When you plan your airflow and keep the path clear, your equipment stays cooler and lasts longer. Good placement and smart design make all the difference.
Effective Circulation
You want your electrical enclosure to stay cool and run smoothly. To do that, you need effective air circulation. Good circulation means air moves everywhere inside the cabinet, not just in one spot. This helps every part of your equipment stay at a safe temperature.
Start by thinking about how air enters and leaves your enclosure. If you only have one fan or vent, some areas might get hot while others stay cool. You can fix this by using a combination of intake and exhaust vents. Place a vent low on the enclosure to pull in cool air. Put another vent high on the opposite side to let hot air escape. This setup creates a chimney effect. Hot air rises and leaves through the top, while cool air comes in from below. Your equipment gets a steady flow of fresh air.
Sometimes, natural airflow is not enough. Maybe your enclosure sits in a hot room or has lots of heat-producing devices. In these cases, you need active ventilation. Install fans to force air movement. Fans push air across all the components, making sure no spot gets left out. If you cannot move your equipment around, fans become even more important. They help air reach every corner, even behind large parts.
Tip: If you notice hot spots inside your cabinet, try adding a small fan near those areas. This can make a big difference in cooling.
Some enclosures need even more protection. If you want to keep dust, moisture, or outside air away from your equipment, use a closed-loop cooling system. These systems use air conditioners or heat exchangers. They cool the air inside the enclosure without letting outside air in. This keeps your equipment safe from dirt and water while still controlling the temperature.
Here are some simple ways to boost air circulation in your enclosure:
- Use both intake and exhaust vents for a natural airflow path.
- Add fans if you need more cooling power.
- Place vents and fans so air moves over all your equipment.
- Try a closed-loop system if you need to keep outside air out.
- Check for blocked paths and move cables or parts if needed.
You can also use heat sinks to help move heat away from sensitive parts. Heat sinks pull heat off components and let the fan carry it away. This keeps your equipment running longer and helps prevent breakdowns.
Remember, good air circulation is not just about adding a fan. It’s about planning where air goes and making sure every part of your enclosure gets cooled. With the right setup, you protect your equipment and keep everything working at its best.
Installation in Cabinet: Mistakes to Avoid
Incorrect Placement
You might think you can put the cabinet fan anywhere, but where you place it is very important. If you put the fan in the wrong spot, your equipment can get too hot. Devices might slow down or stop working. You can see different temperatures inside the cabinet. Hot spots can be almost 5°C warmer than other places. Sensitive electronics can break if the temperature goes above safe levels, like 44°C.
Here’s a simple table showing what happens if you don’t place the fan right:
| Consequence | Description |
|---|---|
| Overheating | Devices get too hot and may stop working. |
| Uneven Temperature Distribution | Hot spots form, causing temperature differences inside the cabinet. |
| Equipment Damage | High heat can break sensitive electronics. |
You need to keep the inlet and exhaust channels open. Try to make air move up and down through the cabinet. This helps cool things better. Check and change the fan’s position when you install it. If you place the fan correctly, your cabinet stays cool and your equipment lasts longer.
Ignoring Airflow Direction
Airflow direction is also very important. If you don’t pay attention, heat can build up at the top of your cabinet. Parts near the top get hotter. You want air to come in from the bottom, move around the hot parts, and leave from the top. Without a clear path for air, heat gets stuck. Your cooling system can’t keep the temperature steady.
Think about how air moves. Cool air should enter low and exit high. This keeps your equipment safe. Always check the arrows on your fan before you install it. The arrows show which way the air will go. If you follow the right airflow direction, you get better cooling and fewer problems.
Tip: If the top of your cabinet feels warm, check the fan direction. You might need to turn the fan or move it.
No Filter in Dusty Areas
Dust can cause big problems. If you don’t use filters in dusty places, you risk trouble. Dust can block cooling fans and vents. It settles on circuit boards and connectors. You see dust build up faster in busy areas or places with open windows. Dust can block air channels. It makes overheating worse. Sometimes, dust can cause circuit shorts.
Studies show dust buildup leads to overheating, system crashes, and hardware damage. About 65% of IT equipment failures are caused by bad cooling and contamination. You need to use filters if your cabinet is in a dusty spot. Clean or change filters often. This keeps your airflow strong and your equipment safe.
Here’s a quick list to help you remember:
- Use filters on intake vents in dusty places.
- Clean filters often.
- Keep air channels open for better cooling.
If you avoid these mistakes, your cabinet fan installation will work better and last longer.
Wrong Voltage
You might think any fan will work if it fits your cabinet, but voltage matters a lot. If you connect your cabinet cooling fan to the wrong voltage, you can run into serious trouble. Fans are designed for a specific voltage, like 12V, 24V, 110V, or 220V. If you mismatch the voltage, the fan might not even start, or it could burn out fast.
Here’s a table that shows what can go wrong when you use the wrong voltage:
| Problem Type | Description |
|---|---|
| Insulation Damage | Incorrect voltage can break down insulation, causing shorts and failures. |
| Motor Burnout | The motor can overheat and fail if the voltage doesn’t match. |
| Overheating | Fans may get too hot, which lowers efficiency and shortens life. |
| Reduced Efficiency | The fan won’t move as much air or use energy well. |
| Unexpected Failures | The fan might stop working without warning. |
| Shortened Lifespan | Running at the wrong voltage wears out the fan much faster. |
| Current Unbalance | Wrong voltage can cause current problems and more issues. |
| Bearing Failure | Overheating can damage the bearings, making the fan noisy or stuck. |
You want your fan to last and keep your equipment safe. Always check the voltage on the fan label and match it to your power supply. If you’re not sure, ask an electrician or check the cabinet’s wiring diagram. Using the right voltage keeps your fan running smoothly and your enclosure cool.
Tip: Never guess the voltage. Double-check before you connect anything!
Blocked Airflow
Blocked airflow is a common mistake that can ruin your cooling system. You might have the best fan, but if air can’t move, your equipment will still get hot. Wires, tools, or even dust can block vents and fans. When airflow gets blocked, static pressure goes up, and the fan can’t push as much air.
Here’s what happens when airflow gets blocked:
- The fan’s effective airflow drops.
- Heat builds up inside the cabinet.
- Exhaust gets weak, and hot spots form.
- Cooling efficiency drops, and equipment can overheat.
- Even a high-power fan can struggle if it can’t overcome the extra pressure.
You should keep vents clear and organize cables with ties. Clean dust and debris from grills and filters. Test your system by feeling for strong airflow at the exhaust. If it feels weak, check for blockages right away.
Note: Good airflow keeps your equipment cool and helps your fan last longer.
Poor Sealing
Poor sealing can let dust, moisture, and unfiltered air sneak into your enclosure. You might see gaps around the fan, vents, or doors. These gaps can undo all your hard work. Dust can settle on circuit boards, and moisture can cause rust or shorts.
To fix this, use gaskets or foam tape around the fan and vents. Check the cabinet doors and panels for tight seals. If you see dust inside, look for leaks and seal them up. A well-sealed cabinet keeps your cooling system working at its best and protects your equipment from damage.
Tip: Check your seals every few months. Replace worn gaskets to keep your enclosure safe and clean.
Buyer Information Checklist
Cabinet Size and Heat Source
You need to know your cabinet size and where the heat comes from before picking a cooling fan. Measure the height, width, and depth of your enclosure. Write these numbers down. The size of your cabinet changes how much air you need to move. Bigger cabinets usually cool better because they have more surface area. Think about where your heat-generating equipment sits. If you place hot devices near the bottom, you help the fan pull cool air in and push hot air out. If you use side-mounted fans, put the hottest equipment next to the cool air inlet. This setup helps your cooling system work smarter. Don’t forget to check how many devices make heat. More heat means you need a stronger fan.
Tip: Draw a simple sketch of your cabinet and mark where the hot equipment sits. This helps you plan airflow and fan placement.
Temperature Requirements
You want your equipment to stay safe and run well. Cooling fans lower the temperature inside your cabinet by moving air. Fans work best in places where outside temperatures don’t get too extreme. If your devices can handle temperatures a bit higher than the room temperature, a fan is a good choice. If you want to save power, fans help, but only if the temperature stays below your equipment’s limit.
Here’s what you should check:
- Find out the safe temperature for your machinery.
- Figure out how much heat your devices make.
- Calculate how much air you need to move to keep things cool.
- Compare the needed temperature drop with the outside temperature.
If you need to keep things much cooler than the room, a fan might not be enough. You may need a stronger cooling system.
Note: If your cabinet sits in a hot room or near machines, check the temperature often. Fans can only do so much.
Voltage and Airflow
You must match the fan’s voltage to your cabinet’s power supply. Most fans use 110–240V AC or 12/24V DC. Check your cabinet’s wiring and pick a fan that fits. If you use the wrong voltage, the fan may run slow, move less air, or even fail.
Airflow matters, too. The fan’s airflow rating, measured in cubic feet per minute (CFM), tells you how much air it can move. You need enough airflow to push heat out of the cabinet. If your fan is too weak, hot spots can form. If it’s too strong, you might get extra noise or vibration.
Here’s a quick table to help you:
| Fan Feature | What to Check |
|---|---|
| Voltage | Match to cabinet power supply |
| Airflow (CFM) | Enough to cool all equipment |
| Fan Type | DC for speed control, AC for easy setup |
DC fans give you better speed control and efficiency. AC fans are simple to install. Always check the total wattage of your devices. This helps you pick the right airflow and fan size.
Tip: Write down your cabinet’s voltage and total heat load before shopping for a fan. This makes your choice easier and safer.
Installation Location
Where you put your electrical enclosure matters a lot. The installation location can change how well your cabinet fan works. You want to think about this before you buy a fan. Some places are easy to cool. Others need more planning.
First, look at where your cabinet sits. Is it inside a clean office? Maybe it’s in a hot factory or outside in the sun. Each spot brings its own challenges. If your enclosure sits in a cool, air-conditioned room, you might not need a big fan. A small, quiet fan could do the job. If your cabinet sits in a warehouse or near machines, you might need a stronger fan. Heat from other equipment can make your cabinet warmer.
Outdoor locations need special care. Sunlight can heat up your enclosure fast. Rain, snow, and wind can also affect your cooling system. You might need a fan with a high IP rating to keep out water and dust. Look for fans made for outdoor use. These fans last longer and keep your equipment safe.
Think about how much space you have around your cabinet. If your enclosure sits against a wall, you might not have room for a big fan or vent. Make sure you leave space for air to move in and out. If you block the vents, your fan can’t cool the equipment. Try to keep at least a few inches of space around each vent.
Noise is another thing to consider. If your cabinet sits near people, a loud fan can be annoying. Offices and control rooms need quiet fans. In a noisy factory, fan noise might not matter as much. Always check the noise level before you buy.
Here’s a quick checklist to help you pick the right fan for your installation location:
- Is your cabinet indoors or outdoors?
- Does the area get hot or stay cool?
- Is there dust, water, or oil nearby?
- How much space do you have for fans and vents?
- Do you need a quiet fan for offices or a strong fan for factories?
Tip: Always check the spot where you plan to install the cabinet. Take a photo or draw a quick sketch. This helps you remember the details when you shop for a fan.
You can make your cooling system work better by thinking about the installation location. The right fan keeps your equipment safe and helps your enclosure last longer.
Conclusion
You can keep your electrical enclosure safe and running by following the right steps for cooling. Plan your project, pick the best cooling fan, and check airflow direction. Always put safety first. For the best cooling, clean filters every 3 months and check your system every 6 months. Good cooling means fewer problems and longer equipment life. Want help with cooling? Share your cabinet details with us. LINKWELL offers a full range of cooling solutions and can help you choose the right fan for your needs.
FAQ
How do I know what size fan my cabinet needs?
You can measure your cabinet’s volume and check the heat load. Look for fans with the right CFM rating. If you’re unsure, ask for help or use a fan sizing calculator.
Can I install a cabinet fan myself?
Yes, you can install a cabinet fan if you follow safety steps. Turn off the power, wear PPE, and use the right tools. If you feel unsure, ask a professional for help.
Do I need a filter for my cabinet fan?
If your cabinet sits in a dusty area, you need a filter. Filters keep dust out and protect your equipment. Clean or replace filters often for best results.
What happens if I install the fan backwards?
If you install the fan backwards, airflow goes the wrong way. Hot air stays inside, and cooling drops. Always check the arrows on the fan before mounting.
How often should I clean or replace filters?
You should clean or replace filters every month. If your area is very dusty, check filters more often. Clean filters help your fan work better.
Can I use more than one fan in my enclosure?
You can use multiple fans for bigger cabinets or higher heat loads. Place intake fans at the bottom and exhaust fans at the top for best airflow.
What should I do if my fan makes noise?
Check the mounting screws and gasket. Tighten loose parts. Clean dust from the blades. If noise continues, the fan may need replacement.
Is it safe to use a cabinet fan outdoors?
You can use a cabinet fan outdoors if it has a high IP rating. Look for fans made for outdoor use. These fans resist dust and water.