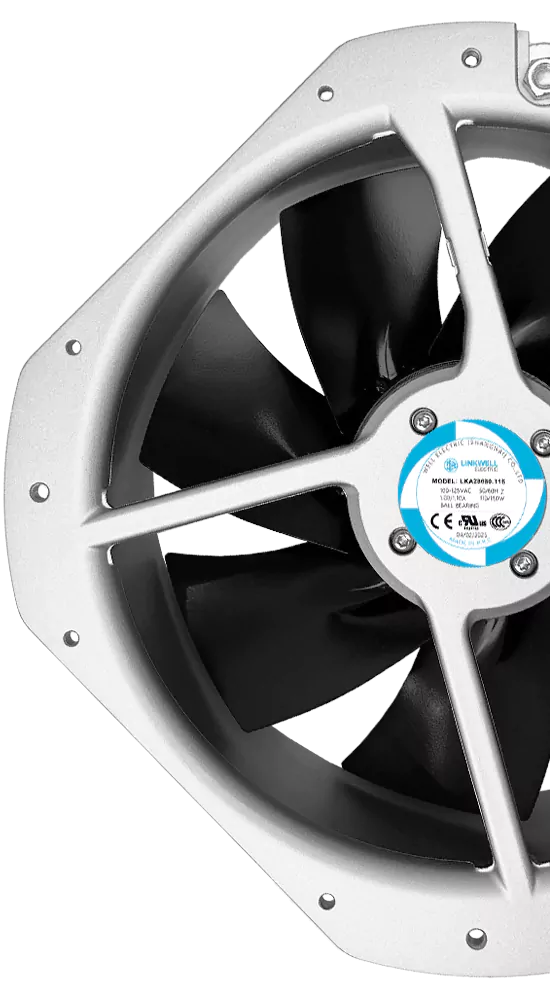
You can change how fast a dc axial fan spins in two main ways: PWM and voltage control. PWM technology helps the fan work better because it does not waste much power. The fan also gets quieter, with noise going down by up to 6dBA. Voltage control lets you change the speed easily. Both ways help save energy and make the fan last longer. If you want better dc axial fan speed control, these methods really help.
Key Takeaways
- PWM control lets you change fan speed very accurately. Fans can run quietly and use less energy with PWM.
- Voltage control is easy to use but not very smooth. It can make the fan speed jump suddenly. Fans might even stop working at low voltages.
- A potentiometer or resistor gives simple manual control for DIY projects. But it is not as accurate as PWM.
- Light dimmers can change fan speed if made for DC. Using the wrong dimmer can break the fan.
- Brushless fans work best with PWM control. They last longer and make less noise than brushed fans.
- Always look at your fan’s details before picking a speed control. This helps the fan work its best.
- PWM saves energy and lowers noise. It is the top choice for work or factory use.
- Think about what you need, like airflow and noise, before choosing a fan speed control.
DC Axial Fan Speed Control Methods
When you want to change how fast your DC axial fan spins, you have a few options. Each method has its own way of working, and some are better for certain fans or situations. Let’s look at the most common ways you can control your fan’s speed.
PWM Fan Speed Control
PWM fan speed control is one of the most popular methods today. If you use a dc fan with pwm input, you send a special signal to the fan instead of just changing the voltage. This signal turns the power on and off very quickly. The fan’s circuit reads this pattern and adjusts the speed smoothly. You get precise control, and the fan can run at lower speeds without stopping. This method works best with 4-pin fans, also called dc fan with pwm input. You can adjust the speed without making the fan noisy or wasting energy.
Here’s a quick comparison between PWM and voltage control:
| Aspect | PWM Control (4-pin fans) | Voltage Control (3-pin fans) |
|---|---|---|
| Control Method | Uses a fixed +12V supply with a PWM signal on a separate pin to modulate speed seamlessly | Varies voltage supplied to the fan to control speed, which can cause abrupt changes during tuning |
| Speed Control Precision | Allows smooth and seamless speed adjustments without abrupt changes | Tuning can cause sudden jumps in voltage, leading to less smooth speed changes |
| Startup Behavior | Can start and run at lower speeds without stalling | Requires full 12V at startup to reliably spin the fan, cannot start at low speeds |
| Compatibility | 4-pin headers provide PWM signals; 3-pin fans plugged into 4-pin headers run at full speed as PWM signal is missing | 4-pin fans plugged into 3-pin headers lose PWM control and run based on voltage supplied, losing PWM benefits |
| Speed Range | Can run at lower speeds reliably due to PWM modulation circuitry | Limited low-speed operation; fans may stall or require full voltage to start |
Tip: If you want the best speed control, try using a dc fan with pwm input and a 4-pin connector.
Voltage Control Techniques
Voltage control is another common way to manage your fan’s speed. You simply lower or raise the voltage that goes to the fan. Most 3-pin fans use this method. When you drop the voltage, the fan spins slower. This method is easy to set up, but it does not always give you smooth changes. Sometimes, the fan speed jumps up or down suddenly when you adjust the voltage. Also, the fan might not start spinning if the voltage is too low. If you use a 4-pin fan on a 3-pin header, you lose the benefits of pwm fan speed control and the fan just runs based on the voltage.
Potentiometer and Resistor Methods
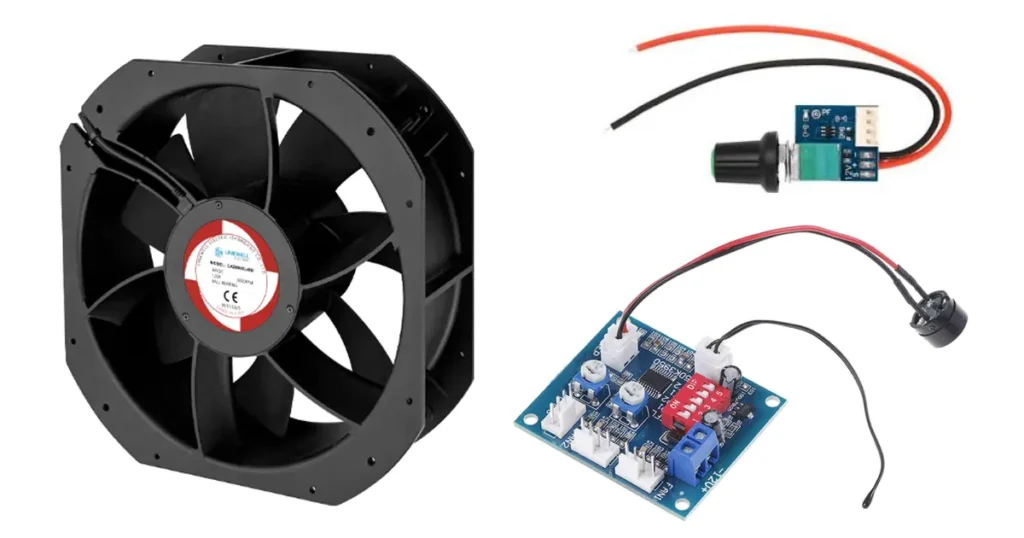
You can also use a potentiometer or a resistor to control the speed. This method works by adding resistance to the circuit, which lowers the voltage that reaches the fan. It’s a simple way to get manual control, and you can easily add it to a DIY project. You just turn the knob to change the speed. However, this method is not very precise. The fan might not start at low speeds, and you can’t fine-tune the speed as well as with other methods. Still, for basic projects or quick fixes, it gets the job done.
Note: Potentiometer and resistor methods are great for simple setups, but they don’t offer the same level of control as PWM or voltage adjustment.
Light Dimmer Use
You might wonder if you can use a light dimmer to control your DC axial fan speed. The answer is yes, but with some important things to keep in mind. Light dimmers are easy to find at hardware stores. Many people already have one at home. You just turn the knob or slide the lever to change the power. This sounds simple, right? But let’s look at how it really works for fans.
A light dimmer changes the amount of power that goes to a device. It does this by cutting the voltage or changing the way the power flows. When you use a light dimmer with a DC axial fan, you lower the voltage, which slows the fan down. This method seems like a quick fix, but it has some big drawbacks.
Benefits of Using a Light Dimmer:
- Super easy to install. You just connect the fan wires to the dimmer.
- Cheap and available almost everywhere.
- Gives you basic control over fan speed.
Limitations and Risks:
- Most light dimmers are made for AC (alternating current), not DC (direct current). If you use the wrong type, you can damage your fan or the dimmer.
- The fan might not start at low settings. It could stall or make strange noises.
- You don’t get smooth speed control. The fan speed might jump or act weird.
- Using a dimmer can make the fan less efficient. It might even shorten the fan’s life.
Tip: If you want to try this method, always check if your dimmer works with DC power. Some special dimmers are made for DC circuits. Regular household dimmers usually do not work with DC fans.
Here’s a quick table to help you decide if a light dimmer is right for your project:
| Feature | Light Dimmer Use |
|---|---|
| Cost | Low |
| Installation | Easy |
| Compatibility | Only with DC dimmers |
| Speed Control Quality | Poor to Fair |
| Risk of Damage | High with wrong dimmer |
If you just want a quick and cheap way to slow down a fan for a hobby project, a DC light dimmer might work. For anything important, like cooling electronics or running a fan all day, you should pick a safer and more reliable method. Always read the labels and instructions before you connect a dimmer to your fan. Safety comes first!
DC Axial Fan Types and Compatibility
Brushed vs Brushless Fans
When you look at a dc axial fan, you might wonder what makes one different from another. The answer often comes down to the motor inside. You will find two main types: brushed and brushless. Brushed fans use small brushes to help the motor spin. These brushes touch moving parts, so they wear out over time. Brushed fans usually cost less, but they can get noisy and need more maintenance.
Brushless fans work in a smarter way. They use electronics to spin the motor, so there are no brushes to wear out. This design makes brushless fans last longer and run quieter. You also get better control over speed. If you want a fan for a job that runs all day, like cooling a server rack, a brushless dc axial fan is the best choice. You get less noise and more reliable performance.
Tip: Brushless fans often support advanced speed control, like PWM, which helps you fine-tune the airflow and keep things quiet.
Fan Wire Types
You might notice that not all fans have the same number of wires. The wires tell you what kind of control and feedback you can expect. Here’s a quick look at the differences:
| Fan Type | Speed Control Compatibility | Key Features |
|---|---|---|
| 2-Wire | Fixed speed, no feedback | Simple wiring, low cost, basic on/off operation |
| 3-Wire | Speed feedback only | Adds tachometer signal for monitoring, no control |
| 4-Wire | Dedicated speed control | PWM command wire for precise speed management, retains tach feedback |
A 2-wire fan gives you basic on/off control. You can’t change the speed or check how fast it spins. A 3-wire fan adds a tachometer output. This means you can monitor the speed, but you still can’t control it directly. If you want both control and feedback, look for a 4-wire fan. These fans let you use PWM for smooth speed changes and also give you a tach signal to track performance.
Fan Type Compatibility
Not every speed control method works with every fan. Here’s what you need to know:
- Brushed dc axial fans work best with simple voltage control. You can slow them down by lowering the voltage, but they might get noisy or wear out faster.
- Brushless fans shine when you use PWM. You get quiet operation and precise speed control. PWM works at high frequencies, so you won’t hear annoying sounds.
- If you use a dc fan with tachometer output, you can monitor speed, but you need a 4-wire fan for full PWM control.
- For important jobs, like cooling electronics, brushless fans with PWM and tach feedback give you the best mix of long life and quiet running.
Note: Always check your fan’s wires and motor type before picking a speed control method. The right match keeps your fan running smoothly and helps your equipment last longer.
Voltage Control for DC Axial Fans
How Voltage Control Works
You can control the speed of your dc axial fan by changing the voltage you give it. When you turn up the voltage, the fan spins faster and pushes more air. If you lower the voltage, the fan slows down and moves less air. This simple method lets you match the fan speed to your cooling needs. You do not need any fancy electronics. Just adjust the voltage, and you will see the fan respond right away. This is one of the oldest ways to handle dc axial fan speed control.
Pros and Cons
Voltage control is easy to use, but it comes with some trade-offs. Let’s look at what you get and what you might need to watch out for.
Pros:
- Simple setup. You do not need special controllers.
- Works with most 2-wire and 3-wire dc axial fans.
- Lets you use basic parts like resistors or potentiometers.
Cons:
- The fan might not start if the voltage is too low.
- Speed changes can feel jumpy, not smooth.
- The fan can get noisy, especially at low speeds.
- You might lose some energy as heat in the control parts.
Noise can be a big issue when you use voltage control. Here are some common noise problems and how you can fix them:
| Noise Issue | Possible Causes | Solutions |
|---|---|---|
| Excessive noise | Worn bearings need lubrication | Lubricate the bearings with silicone oil or light oil |
| Fan blades deformed or blocked | Clean the blades and check for deformation | |
| Installation problems or vibration | Secure installation and add rubber pads to reduce noise |
Tip: If your fan gets noisy, check for dust, loose screws, or bent blades. A little cleaning can make a big difference.
Voltage Control Steps
You can set up voltage control for your dc axial fan in a few easy steps. Here’s how you can do it safely and get the best results.
Power Supply Selection
Pick a power supply that matches your fan’s voltage and current needs. Most dc axial fans run on 5V, 12V, or 24V. Check the label on your fan. Make sure your power supply can give enough current for the fan to start and run. If you use a dc fan with tachometer output, you can also monitor the speed while you adjust the voltage.
Using Potentiometers or Resistors
You can use a potentiometer or a fixed resistor to change the voltage that reaches your fan. A potentiometer works like a volume knob. Turn it, and you can make the fan go faster or slower. A resistor drops the voltage by a set amount. This is a cheap way to slow down the fan, but you cannot adjust it on the fly.
Here’s a simple way to wire a potentiometer:
- Connect one end of the potentiometer to the positive wire from your power supply.
- Connect the other end to the positive wire on your fan.
- Connect the ground wires together.
- Turn the knob to set your fan speed.
Note: Regulating the speed of a fan by voltage is easy, but always start with the knob turned up. This helps the fan start spinning before you slow it down.
Safety Tips
Safety comes first when you work with electricity. Here are some quick tips:
- Always unplug your power supply before you connect wires.
- Use insulated tools to avoid shocks.
- Do not set the voltage lower than the fan’s rated minimum. The fan might stall and overheat.
- Check your connections for loose wires.
- If you smell burning or see smoke, turn everything off right away.
Alert: Never use an AC dimmer switch with a DC fan. This can damage your fan and cause safety problems.
You now know how voltage control works for dc axial fans. This method gives you a simple way to handle speed control, but you need to watch for noise and make sure your fan starts every time. For many projects, voltage control is a good choice, especially if you want something quick and easy.
PWM Fan Speed Control Explained
How PWM Works
Let’s talk about how PWM fan speed control actually works. PWM stands for pulse-width modulation. You control the speed of your dc axial fan by sending it a special signal that turns the power on and off very quickly. This signal is called a duty cycle. When you increase the duty cycle, you give the fan more power, so it spins faster. When you lower the duty cycle, the fan gets less power and slows down. The fan’s electronics read these fast pulses and adjust the speed smoothly. You don’t just change the voltage—you change how long the fan gets full power during each cycle. This method gives you fine control over how fast your fan spins, which is great for dc axial fan speed control.
Tip: If you want your fan to run quietly and efficiently, PWM is a smart choice. You can set the speed exactly where you want it.
PWM Pros and Cons
You might wonder why so many people choose pwm control for their fans. Here are some reasons:
- You can adjust the fan speed in tiny steps. This means you get just the right amount of airflow for your needs.
- The fan only uses as much energy as it needs. This saves power and helps your system run cooler.
- Fans stay quiet because they don’t have to run at full speed all the time. You’ll notice less noise, especially when your system isn’t working hard.
But there are a few things to watch out for:
- PWM fans and controllers usually cost more than basic voltage-controlled fans.
- Some older motherboards or fan controllers don’t support PWM signals. You need to check if your hardware can handle it.
- If your system doesn’t support PWM, you won’t get the benefits of smooth speed control.
Note: Always check your fan and motherboard specs before you buy. Not every system supports pwm fan speed control.
PWM Control Steps
Ready to set up PWM for your dc axial fan? Here’s how you can do it:
Choosing a PWM Controller
First, you need a controller that can send PWM signals. Many modern motherboards have 4-pin fan headers that support PWM. If your motherboard doesn’t have this feature, you can buy a separate PWM fan controller. Look for one that matches your fan’s voltage and current needs. Some controllers let you set the speed with a knob, while others use software for automatic control.
Tip: If you want to control multiple fans, pick a controller with enough channels for all your fans.
Wiring Tips
Wiring a PWM fan is simple, but you need to pay attention to the pins:
- Find the 4-pin connector on your fan. The pins are usually labeled as power, ground, tach (speed signal), and PWM.
- Plug the fan into the 4-pin header on your motherboard or controller. Make sure the pins line up.
- If you use a separate controller, follow the wiring diagram in the manual. Double-check your connections before you turn on the power.
Here’s a quick table to help you remember the pinout:
| Pin Number | Function | Description |
|---|---|---|
| 1 | Ground | Black wire, negative |
| 2 | Power (+12V) | Red wire, positive |
| 3 | Tachometer | Yellow wire, speed feedback |
| 4 | PWM Signal | Blue wire, speed control |
Alert: Never force a connector. If it doesn’t fit, check the orientation. Forcing it can damage your fan or controller.
Now you know how to set up pwm fan speed control for your dc axial fan. You get quiet, efficient, and precise control with just a few simple steps.
Comparing PWM and Voltage Control
Efficiency and Performance
When you look at how well your fan works, you want it to move air smoothly and use as little power as possible. PWM control really shines here. With PWM, your fan can run at lower speeds without stalling. It starts up easily, even when you set it to a slow speed. You get a wide range of control, so you can fine-tune the airflow for your needs. Fans using PWM run at their best voltage, which means less wasted energy and less heat.
Here’s what you get with PWM and voltage control:
- PWM fans can operate at lower minimum speeds and start up more easily.
- They run at their most efficient voltage, so they waste less energy.
- You get a broader control range, which means lower power use over time.
- PWM fans produce less heat and offer finer speed control.
- Voltage-controlled fans may struggle to start at low voltages and can’t go as slow without stalling.
If you want to see the differences at a glance, check out this table:
| Feature | PWM Control | Voltage Control |
|---|---|---|
| Control Precision | Very high, allows fine-tuning | Lower |
| Control Range | Wide, from 10-100% (no stalling) | More limited (stall risk) |
| Efficiency | More efficient, especially at low speeds | Less efficient at low speeds |
| Circuit Complexity | More complex, needs PWM signal | Simpler, direct voltage |
| Potential Noise | Faint switching noise possible | Usually quieter |
Reliability and Lifespan
You want your fan to last a long time and work well every day. PWM fans, especially 4-pin models, let you manage noise, temperature, and lifespan more precisely. These fans can keep running smoothly for years. Some EC and BLDC motors keep over 95% of their rated performance after 50,000 hours. That’s a lot of cooling! Traditional fans using voltage control may lose airflow faster and need more maintenance.
Here’s why PWM fans last longer:
- They run cooler, which means less wear on parts.
- You can set them to run only as fast as needed, reducing stress.
- EC and BLDC motors save 35–55% more energy than old-style fans.
If you want a fan that keeps going strong, PWM is a smart pick.
Cost and Complexity
Let’s talk about what you’ll spend and how hard it is to set things up. Voltage control fans usually cost less at first. You just adjust the voltage, and you’re done. But over time, you might pay more for energy and maintenance. PWM fans cost a bit more up front. You need a controller that can send the right signal. The setup is a little more complex, but you save money in the long run because the fan uses less power and needs less fixing.
Here’s a quick look at the costs:
| Fan Type | Initial Cost | Long-term Cost | Energy Efficiency | Maintenance Cost |
|---|---|---|---|---|
| DC Fans | Lower | Higher | Less efficient | More frequent |
| PWM Fans | Higher | Lower | More efficient | Less frequent |
If you want simple and cheap, voltage control works. If you want better performance and savings over time, PWM is worth it. When you think about dc axial fan speed control, consider how much you want to spend now and how much you want to save later. Good speed control can make your fan last longer and work better.
Summary Table
You have seen a lot of details about fan speed control. Sometimes, it helps to see everything in one place. Here’s a handy table that puts the main points side by side. This way, you can quickly compare pwm control and voltage control for your DC axial fan.
| Feature | PWM Control | Voltage Control |
|---|---|---|
| Speed Adjustment | Very precise, smooth changes | Less precise, can be jumpy |
| Minimum Speed | Can run at very low speeds | May stall at low voltage |
| Startup Reliability | Starts easily at any speed | Needs full voltage to start |
| Energy Efficiency | High, less wasted power | Lower, more energy lost as heat |
| Noise Level | Quieter at low speeds | Can get noisy at low voltage |
| Fan Lifespan | Longer, less wear | Shorter, more wear |
| Cost | Higher upfront | Lower upfront |
| Setup Complexity | Needs PWM controller and 4-pin fan | Simple, just adjust voltage |
| Compatibility | Best with 4-wire brushless fans | Works with 2- or 3-wire fans |
Tip: If you want the best mix of quiet operation, long life, and energy savings, pwm control is usually the way to go. You get more control and your fan will thank you!
Let’s break down what this means for you:
- If you want easy setup and a low price, voltage control works fine for basic projects.
- If you care about saving energy, reducing noise, and making your fan last longer, PWM is a smart choice.
- For important jobs, like cooling computers or electronics, PWM gives you the most reliable results.
- For quick fixes or hobby projects, voltage control is simple and gets the job done.
You don’t have to guess which method is best. Just look at your needs and match them to the table above. This makes picking the right fan speed control method much easier.
Remember, always check your fan’s wires and specs before you start. The right match keeps your fan running smoothly and safely.
Choosing the Right Fan Speed Control Method
Use Case Recommendations
Picking the best way to control your fan speed depends on what you need. Let’s look at some common situations and see which method fits best:
- Hobby Projects or Quick Fixes
If you just want a simple way to slow down a fan, try using a resistor or potentiometer. This works well for small DIY projects where you do not need perfect control. You can also try regulating the speed of a fan by voltage if you want something easy and cheap. - Professional or Industrial Settings
For jobs that need reliability and long life, like cooling in factories or server rooms, PWM control is the top choice. It gives you precise speed control and helps your fan last longer. Many professionals also use fans with tachometer output so they can monitor speed and spot problems early. - Energy Savings
If you want to save power, PWM speed control is your friend. It lets you adjust airflow to match how much cooling you need. This makes your system more efficient and cuts down on wasted energy. - Noise-Sensitive Environments
Offices, labs, and bedrooms need quiet fans. Lowering the fan speed by just 10% can drop noise by 2 dBA. If you cut speed by 20%, you can get up to 5 dBA less noise. PWM control or a variable frequency drive helps you get smooth, quiet operation.
Here’s a quick table to help you match your needs to the right method:
| Use Case | Recommended Method | Why It Works |
|---|---|---|
| Hobby/DIY | Potentiometer/Resistor | Simple, low cost, easy to set up |
| Professional/Industrial | PWM + Tachometer Output | Reliable, precise, easy to monitor |
| Energy Savings | PWM | Dynamic airflow, high efficiency |
| Noise Reduction | PWM or VFD | Smooth, quiet, less fan noise |
Tip: Always check your fan’s wires and specs before you start controlling the speed of a fan. This helps you avoid problems and keeps your setup safe.
Key Considerations
Before you pick a speed control method, think about these important factors:
- Airflow needs
- Power supply compatibility
- Noise levels
- Bearing type
- Environmental protection
- Efficiency of the speed control method
Professionals also look at a few more details. Here’s a table that shows what matters most in bigger jobs:
| Key Consideration | Description |
|---|---|
| Fan Type and Size | Some fans need special control methods based on their design. |
| Power Requirements | Make sure your control parts can handle the fan’s power needs. |
| System Dynamics | The fan should respond smoothly to speed changes. |
| Voltage and Current | Your controller must match the fan’s ratings. |
| Thermal Management | Good cooling is needed for both the fan and the controller. |
| Speed Range and Precision | Decide how much control you need over the fan speed. |
| Operating Environment | Fans in tough places need strong, reliable controls. |
| Noise Concerns | Smooth speed changes help keep things quiet. |
Note: If you want to get the most out of your fan, choose a method that matches your needs and your fan’s features. PWM works best for most modern fans, but voltage control can still be useful for simple setups.
When you think about these points, you can pick the right method for your project. This helps your fan run better, last longer, and stay quiet.
Conclusion
When you look at dc axial fan speed control, you see big differences between PWM and voltage control. PWM gives you smoother speed changes and better low-speed stability. Voltage control is simple but less precise, especially at slow speeds. Always check your fan type before choosing a method. Here’s a quick guide:
| Fan Type | Best Control Method |
|---|---|
| 3-pin fan | Voltage control |
| 4-pin PWM fan | PWM control |
Need help picking the right fan or control method? We make DC axial fans and can give you expert advice for your project!
FAQ
What is the easiest way to control a DC axial fan’s speed?
You can use a potentiometer or a simple voltage controller. Just turn the knob to make your fan go faster or slower. This method works well for small projects or quick fixes.
Can I use a 4-pin PWM fan with a 3-pin connector?
Yes, you can plug a 4-pin fan into a 3-pin header. The fan will run at full speed, but you lose PWM control. You can only adjust the speed by changing the voltage.
Why does my fan make noise at low speeds?
Fans can get noisy at low speeds because of vibration or worn bearings. Try cleaning the fan and checking for dust. If the noise continues, the fan might need oil or replacement.
Is PWM better than voltage control for saving energy?
Yes! PWM lets your fan use only the power it needs. You get better energy savings and less heat. Voltage control wastes more energy, especially at low speeds.
What happens if I set the voltage too low?
If you set the voltage too low, your fan might not start or could stall. Always start your fan at full voltage, then lower it to your desired speed.
Can I use a light dimmer to control my DC fan?
Most light dimmers work with AC, not DC. Using the wrong dimmer can damage your fan. Only use a DC-rated dimmer if you want to try this method.
How do I know if my fan supports PWM?
Check the wires. A PWM fan has four wires. The fourth wire is usually blue and marked “PWM.” You can also look at the fan’s label or datasheet for details.
What should I do if my fan stops spinning after lowering the speed?
Turn the speed back up to full for a moment. If the fan starts spinning again, lower the speed slowly. If it still stops, your voltage or PWM setting may be too low for that fan.