RGB fans do more than make your PC look amazing—they help keep your system cool. You might feel nervous about how to connect rgb fans to motherboard, especially with so many connector types and voltage options. Don’t worry! With LINKWELL’s decades of engineering, you can trust this guide for safe, spectacular results.
Key Takeaways
- Identify your RGB fan type before connecting. Check if it’s a 12V RGB or 5V ARGB fan to ensure proper setup.
- Always match the voltage and pin configuration. Connecting a 5V fan to a 12V header can damage your LEDs.
- Gather all necessary tools and accessories before starting. This includes fans, cables, and a motherboard manual for a smooth installation.
Identify RGB Fan Type and Motherboard Headers
RGB vs ARGB Standards
Before you start, you need to know what type of RGB fan you have. LINKWELL RGB Computer Fans come in both 12V RGB and 5V ARGB versions, and each works differently. RGB fans use a 4-pin connector and show one color across all LEDs at a time. ARGB fans use a 3-pin connector and let you control each LED for cool effects.
Addressable RGB (or ARGB) uses a more complex system organized into nodes. Each node contains one LED of each color plus its own controller chip, allowing for individual control of each LED. This system operates on a 5V 3-pin configuration, which is distinct from the traditional 4-pin RGB setup.
Locating RGB Headers on Motherboard
You can find the right header by checking your motherboard manual or looking for labels near the connectors. Here’s a quick way to spot the difference:
| Header Type | Pin Configuration | Voltage |
|---|---|---|
| RGB | 4-pin | 12V |
| ARGB | 3-pin | 5V |
LINKWELL fans have clear labels, so you can match them easily to your motherboard.
Voltage Matching for Safe Connection
Matching voltage is the most important step in how to connect rgb fans to motherboard. Never plug a 5V ARGB fan into a 12V RGB header or the other way around.
⚠️ Warning: Plugging a 3-pin ARGB fan into a 4-pin RGB header will fry the LEDs. The 12V power is too much for 5V addressable LEDs, and there’s no data pin to control them.
Follow these steps before you connect anything:
- Check your fan’s label or manual.
- Look at your motherboard’s headers.
- Make sure the voltage and pin count match.
Taking a few minutes to audit your gear can save you from costly mistakes.
How to Connect RGB Fans to Motherboard: Step-by-Step
You’re ready to light up your PC and keep it cool. Let’s walk through how to connect rgb fans to motherboard, whether you’re doing a simple build or going all out with multiple fans.
Preparing Cables and Accessories
Before you start, gather everything you need. This makes the process smooth and helps you avoid mistakes.
- LINKWELL RGB Computer Fans (check if you have 3-pin ARGB or 4-pin RGB)
- Motherboard manual (for header locations)
- RGB controller (if your motherboard lacks RGB headers)
- Splitter cables or RGB hubs (for multiple fans)
- Power supply cables (SATA or Molex, if needed)
- Small zip ties or Velcro straps (for cable management)
Tip: If your motherboard doesn’t have an RGB header, your fan will spin but the RGB lights won’t work. In that case, use a controller that connects to your power supply.
Here’s a quick look at where each connector goes:
| Connector Type | Connection Point |
|---|---|
| RGB Connector | RGB Header |
| Fan Connector | SYS_FAN Slot |
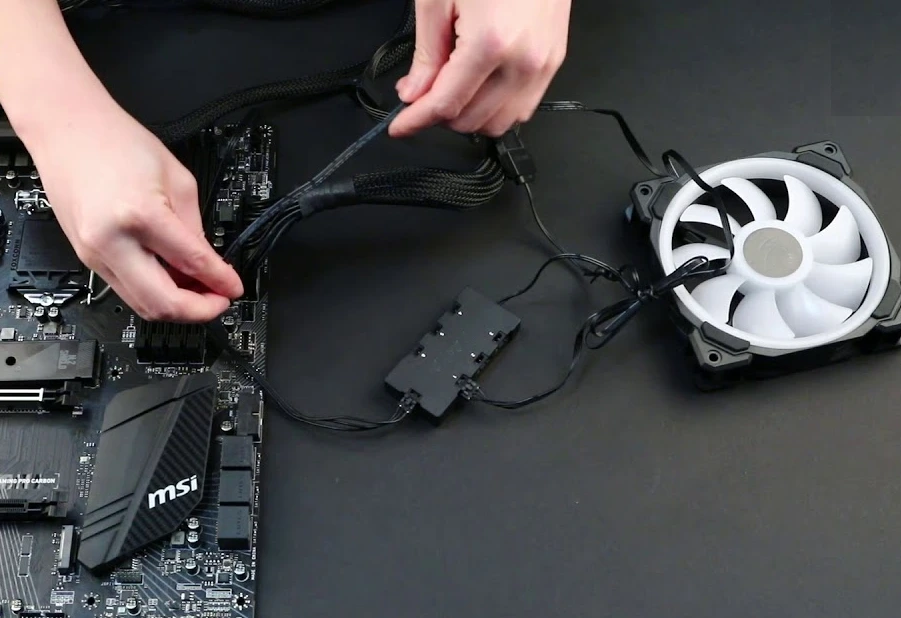
Connecting Power and RGB Cables
Now, let’s get your fans spinning and glowing. Here’s how to connect rgb fans to motherboard in a direct, step-by-step way:
Scenario A: Simple Direct Connection
- Identify the Fan Type: Check if your LINKWELL fan uses a 3-pin (ARGB) or 4-pin (RGB) connector.
- Connect the Fan Power: Plug the fan’s power cable into a SYS_FAN header on your motherboard.
- Connect the RGB Cable: Match the RGB or ARGB cable to the correct header on your motherboard. Align the notches and pins—don’t force it.
- Secure the Connection: Make sure the cable fits snugly. If it feels loose, try flipping the connector or realigning it.
- Power On and Test: Turn on your PC. Check that the fan spins and the lights turn on.
Note: Always match the voltage. A 5V ARGB fan goes to a 5V header. A 12V RGB fan goes to a 12V header. This step is crucial for safe operation.
Scenario B: Expanded System with Hubs or Controllers
If you want more fans than your motherboard supports, or you want advanced lighting control, you’ll need a hub or controller.
- Connect Fans to Hub or Controller: Plug each fan’s RGB cable into the hub or controller. Some hubs use SATA power from your PSU.
- Connect Hub to Motherboard: Use the main cable from the hub to connect to your motherboard’s RGB or ARGB header.
- Connect Fan Power: Plug each fan’s power cable into available SYS_FAN headers or use a powered hub.
- Secure All Connections: Make sure everything is tight and organized.
- Test the Setup: Power on your system. Use your motherboard’s software (like ASUS Aura Sync, MSI Mystic Light, or Gigabyte RGB Fusion) to control the lighting.
Using a hub or controller keeps your wiring neat and lets you control all your fans from one place. This is perfect for big builds or when you want synchronized lighting.
Using Hubs and Controllers
Hubs and controllers make it easy to connect several RGB fans to one motherboard header. They help you manage cables and keep your build looking clean.
- Use a splitter cable if you only need to add one or two extra fans.
- Choose a powered hub for larger setups. Powered hubs draw energy from your PSU, so you don’t overload your motherboard.
- Dedicated controllers let you adjust lighting even if your motherboard doesn’t support RGB. Some LINKWELL kits include these for plug-and-play setups.
LINKWELL offers tailored solutions for every build size. You can get simple fan packs or advanced kits with custom controllers for flawless lighting.
Securing Connections Safely
Safety comes first when you work inside your PC. Here’s how to avoid problems:
- Turn off your power supply before connecting or disconnecting anything.
- Make sure your hands are dry and your workspace is free from water.
- Use zip ties or Velcro straps to keep cables tidy and out of fan blades.
- Double-check that all connectors are fully seated and not loose.
- If you work with bare wires, make sure they’re insulated to prevent short circuits.
- Wear gloves and safety glasses if you want extra protection.
Good cable management isn’t just about looks. It keeps airflow strong and prevents accidental damage.
Compatibility with Major Motherboard Brands
LINKWELL RGB Computer Fans work with most major motherboards, including ASUS, MSI, and Gigabyte. Just make sure your motherboard has the right headers for your fans. If it doesn’t, use a controller for full lighting control.
- Check your motherboard’s manual for header types and locations.
- Most fans have two connectors: one for power, one for RGB.
- If you’re unsure, research your motherboard model or ask LINKWELL’s support team for help.
Now you know how to connect rgb fans to motherboard, whether you’re building a simple system or a custom showpiece. Take your time, follow these steps, and enjoy a cool, colorful PC.
Setup, Troubleshooting, and Best Practices
Software Setup and RGB Control
You want your RGB fans to shine just the way you like. Most motherboards come with their own software for controlling lighting effects. Popular platforms include:
- ASUS Aura Sync
- RGB Fusion 2.0
- Corsair iCUE
- JackNet RGB
- Razer Chroma
- HyperX NGenuity
- Logitech Lightsync
- OpenRGB SDK
You can use these programs to sync colors, set patterns, and adjust brightness. If you use a dedicated controller, check if it comes with its own software. Planning lighting zones, like separating intake and exhaust fans, helps you create a unique look.
Pro tip: For advanced builds or professional projects, LINKWELL offers ODM services for fully customized lighting profiles and controller integration.
Common Issues and Solutions
Sometimes, things don’t light up or spin after installation. Here’s what you can do:
- Turn off your PC and unplug it.
- Open the side panel and find your fan controllers.
- Reseat all connections, making sure each cable is in the right spot.
- If you don’t use a controller, check the cables at the motherboard headers.
- Make sure every connection is secure.
- Unplug one fan and test the others.
- Restart your PC and enter BIOS to check fan settings.
- Set fans to ‘PWM’ mode and max speed if needed.
If you still have trouble, double-check your voltage and header match. This is key for how to connect rgb fans to motherboard safely.
Safety Tips and Double-Checking
Good cable management keeps your system cool and safe. Try these best practices:
- Tuck cables behind the motherboard tray to keep airflow clear.
- Bundle cables with zip ties or Velcro straps.
- Avoid letting cables block intake or exhaust fans.
- Leave a little slack for cables that might need to move.
- Clean your fans every few months with 99% isopropyl alcohol and a lint-free cloth.
- Inspect bearings for any odd noises.
- Make sure your fans meet safety certifications like CE, UL, FCC, and RoHS.
Neat cables look great, boost airflow, and help prevent damage. If you want a truly professional setup, LINKWELL can help with custom solutions for any project.
Testing RGB Computer Fan Speed
After installing RGB Computer Fans, verifying fan speed is essential to ensure proper airflow and stable system cooling. Correct fan operation helps prevent overheating and maintains long-term hardware reliability.
Recommended steps to test fan speed:
- Inspect all power and RGB cables to confirm they are firmly connected to both the motherboard and the fan
- Power on the system and enter the operating system normally
- Use monitoring software such as SpeedFan or HWMonitor
- Review real-time RPM readings to confirm each RGB computer fan is running within the expected speed range
Regular fan speed checks help detect connection issues early and ensure consistent cooling performance.
Setting RGB Lighting and Color Modes
Once RGB Computer Fans are connected, lighting control must be configured using compatible software. If your fans do not include a dedicated controller, motherboard-based RGB software is required.
Most major motherboard brands support RGB lighting management, including:
- MSI Mystic Light
- ASUS Aura Sync
After installing the appropriate software, users can:
- Select static colors or dynamic lighting effects
- Synchronize RGB computer fans with other RGB components
- Adjust brightness and lighting patterns to match the system theme
Proper configuration ensures both visual consistency and reliable RGB performance across the entire PC build.
Conclusion
You’ve made it to the finish line! Let’s quickly recap what you need to remember for a safe and stunning RGB fan setup.
- Identify your fan type. Check if you have 12V RGB or 5V ARGB fans.
- Match the header and voltage. Always connect 5V ARGB fans to 5V headers and 12V RGB fans to 12V headers.
- Gather your tools. Use the right cables, hubs, or controllers for your build.
- Connect carefully. Double-check every connection before you power on your PC.
- Use software for control. Try out your motherboard’s lighting software or a dedicated controller for custom effects.
- Keep things tidy. Manage your cables for better airflow and a cleaner look.
Pro Tip: Never mix up voltages. Plugging a 5V fan into a 12V header can ruin your LEDs for good.
If you want a build that’s both cool and reliable, LINKWELL RGB Computer Fans have you covered. You get industrial-grade durability, easy compatibility, and vibrant lighting—all backed by over 20 years of engineering expertise. Need help or a custom solution? Reach out to the LINKWELL team for technical support or a tailored kit.
Ready to light up your PC? Explore LINKWELL’s full range of RGB fans and take your setup to the next level!
You now know how to connect RGB fans safely. Always match voltage and connector type to avoid damage.
- Too much voltage can fry your LEDs.
- Wrong connectors stop lighting effects.
- Addressable fans need the right data pins.
Need help or a custom setup? Reach out to LINKWELL for expert support.
FAQ
What happens if I connect a 5V ARGB fan to a 12V RGB header?
You risk burning out the LEDs instantly. Always double-check voltage and pin type before plugging in your fan.
Can I control LINKWELL RGB fans with my motherboard software?
Yes! You can use software like ASUS Aura Sync or MSI Mystic Light if your motherboard has the right headers.
Do I need a controller if my motherboard has no RGB headers?
- Yes, you do.
- A controller lets you power and customize your fan’s lighting even without motherboard RGB support.