You want to keep your RV fridge running cool and efficient, but installing a fan can feel tricky. Whether you’re just starting out or you’ve been on the road for years, you might run into a few common challenges:
- Picking a fan that actually fits your fridge.
- Figuring out the best spot for airflow.
- Making sure the fan stays put while you travel.
- Connecting the wires safely.
How to Install Rv Fridge Fan doesn’t have to be stressful. Using a high-quality fan like the fanacdc Rv Fridge Fan gives you peace of mind and better cooling. You’ll find easy instructions, a list of tools, and plenty of tips right here.
Key Takeaways
- Gather the right tools before starting your installation. This includes a fanacdc RV Fridge Fan, screwdrivers, wire strippers, and safety gloves.
- Follow safety steps like unplugging your fridge and wearing gloves. This ensures a safe installation process.
- Mount the fan correctly for optimal airflow. Position it to pull cool air in or push hot air out for better cooling efficiency.
- Check your wiring connections carefully. Use electrical tape to secure them and ensure your fan operates safely and reliably.
- Enjoy improved cooling and food safety. A well-installed fan keeps your fridge at a steady temperature, reducing food waste.
How to Install RV Fridge Fan
Tools and Materials
You want to get started with how to install rv fridge fan, so you need the right tools and materials. Here’s what you’ll need for a smooth process:
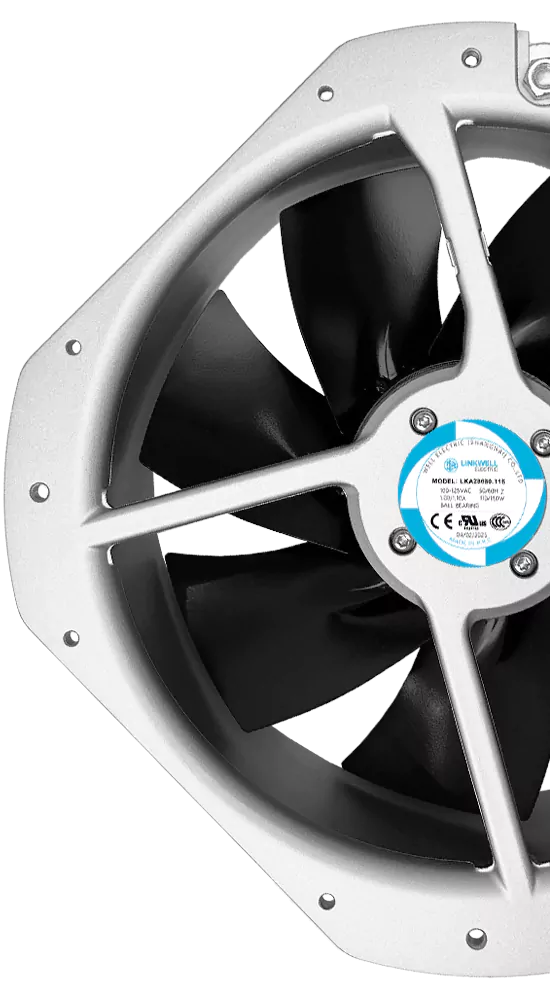
- fanacdc RV Fridge Fan (12V/24V DC, wide voltage range, IP54/IP68 protection)
- Screwdriver set (Phillips and flathead)
- Wire stripper and cutter
- Electrical tape or heat shrink tubing
- Mounting screws or zip ties
- Multimeter (for checking voltage)
- Safety gloves
Tip: The fanacdc RV Fridge Fan stands out because it’s built for durability. You don’t have to worry about vibration or voltage dips. Its reinforced blades and dual ball bearings mean you can trust it to last for years.
Here’s a quick table to help you check your supplies:
| Item | Purpose |
|---|---|
| fanacdc RV Fridge Fan | Cooling and airflow |
| Screwdrivers | Opening fridge vent |
| Wire stripper/cutter | Prepping wires |
| Electrical tape | Securing connections |
| Multimeter | Testing power |
| Safety gloves | Protecting your hands |
Preparation Steps
Before you dive into how to install rv fridge fan, you want to make sure you’re ready. Follow these steps for a safe and easy start:
- Unplug your RV fridge. Safety comes first.
- Put on your safety gloves. You don’t want any surprises.
- Gather all your tools and materials. Double-check your list.
- Read the instructions that come with your fanacdc RV Fridge Fan. These installation instructions are clear and easy to follow.
- Inspect the fridge vent area. Look for dust or debris and clean it out.
- Check your power supply with a multimeter. The fanacdc RV Fridge Fan works from 8V to 16V, so you don’t have to stress about voltage dips.
Note: The fanacdc RV Fridge Fan is reliable and tough. You can count on it to handle harsh environments and keep your fridge cool.
You’re now ready to move on to the next steps. With these instructions and installation instructions, you’ll find how to install rv fridge fan is easier than you think.
Installation Process
Ready to get hands-on? Let’s walk through the step-by-step installation process for your rv rooftop refrigerator vent fan. You’ll find that with the right tools and a little patience, you can complete this process in an afternoon.
Accessing the Fridge Vent
You need to reach the rooftop vent before you can mount the rv rooftop refrigerator vent fan. Here’s how you do it safely:
- Use the RV ladder at the back of your rig or grab a sturdy house ladder.
- Climb up slowly and make sure you have solid footing.
- Once you’re on the roof, locate the refrigerator vent cover. It usually sits near the back edge.
- Remove the vent cover screws with your screwdriver and set the cover aside.
- Take a moment to check the vent area for any debris or blockages. Clean it out if needed.
Tip: Always keep your tools within reach but secure them so nothing slides off the roof.
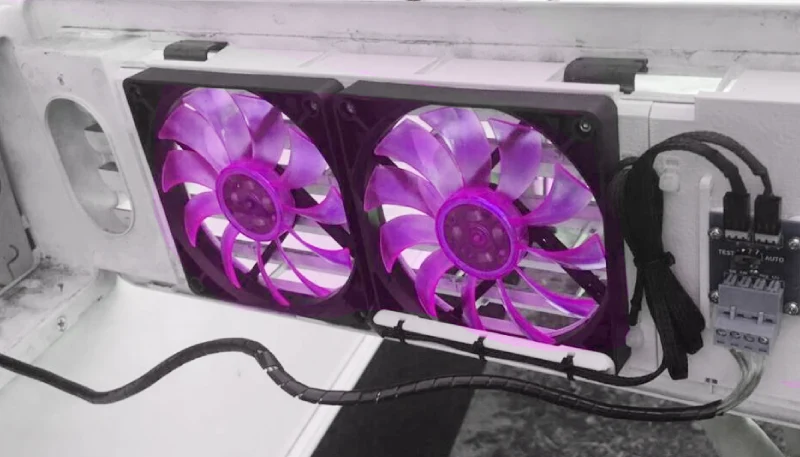
Mount the RV Rooftop Refrigerator Vent Fan
Now you’re ready to mount the rv rooftop refrigerator vent fan. This part is all about positioning and securing the fan for maximum performance.
- Hold the rv rooftop refrigerator vent fan up to the vent opening. Make sure the mounting holes line up with the existing pattern. The fanacdc RV Fridge Fan fits most standard layouts, but you can adjust if needed.
- Decide on the orientation. For best results, position the fan so it will pull cool air in from the bottom or push hot air out the top. This setup boosts airflow and cooling efficiency.
- Use the provided screws or zip ties to secure the fan in place. Tighten everything so the fan won’t rattle or shift during travel.
- Double-check that the fan blades spin freely and nothing blocks their path.
The fanacdc RV Fridge Fan is built to handle vibration and road shocks, so you don’t have to worry about it coming loose.
Wiring and Power Connection
Let’s get your rv rooftop refrigerator vent fan powered up. The wiring process is simple, but you want to do it right for safety and reliability.
- Locate the 12V or 24V DC power supply near your fridge vent. Most RVs have a dedicated line for accessories.
- Strip the ends of the fan wires and the power wires using your wire stripper.
- Connect the positive (red) fan wire to the positive power wire, and the negative (black) fan wire to the negative power wire.
- Secure the connections with electrical tape or heat shrink tubing. This keeps moisture and dust out.
- If your fanacdc RV Fridge Fan has extra features like a built-in thermostat or speed control, follow the included instructions for those connections.
- Use your multimeter to check the voltage. The fanacdc RV Fridge Fan works anywhere from 8V to 16V, so you don’t have to worry about voltage dips or surges.
Note: The fanacdc RV Fridge Fan comes with IP54 or IP68 protection, so it’s safe from humidity and splashes.
Testing and Troubleshooting
You’re almost done! Now it’s time to test your rv rooftop refrigerator vent fan and make sure everything runs smoothly.
- Plug your fridge back in and turn on the power.
- Listen for the fan. You should hear a gentle hum as it starts spinning.
- Feel for airflow at the vent. If you notice strong airflow, you’ve mounted the rv rooftop refrigerator vent fan correctly.
- If the fan doesn’t start, double-check your wiring and power supply. Use your multimeter to confirm voltage.
- Inspect the fan for any vibration or noise. The fanacdc RV Fridge Fan is designed for quiet, stable operation, even on bumpy roads.
If you run into issues, check the installation instructions again or visit the fanacdc website for support.
How to Maximize Airflow and Cooling Efficiency
Want the best cooling results? Here are some quick tips:
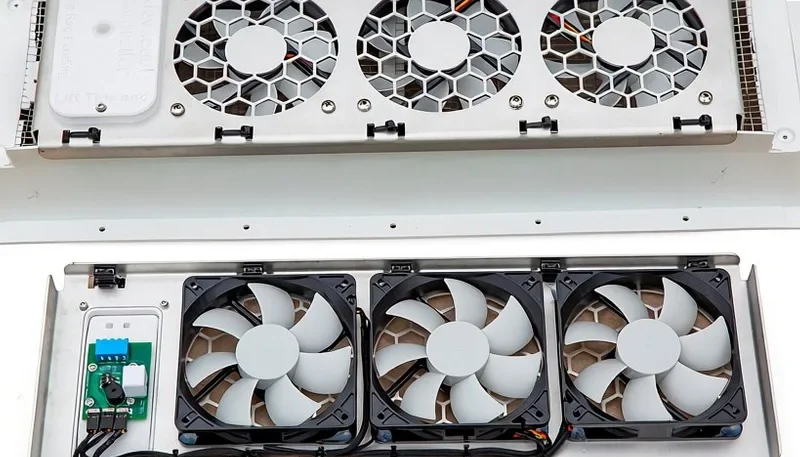
- Make sure intake fans pull cool air from the front and bottom of the fridge compartment.
- Set exhaust fans to push hot air out the back and top.
- Keep a slight positive pressure in the vent system. This helps keep dust out and boosts cooling.
- Place intake vents low and at the front, and exhaust vents high and at the rear.
- For tight spaces, use static pressure blowers. For open areas, use airflow fans.
Pro Tip: The fanacdc RV Fridge Fan’s reinforced blades and dual ball bearings keep it running strong, even in tough conditions. You get reliable cooling with less maintenance.
With this step-by-step installation process, you can mount the rv rooftop refrigerator vent fan with confidence. You’ll enjoy better fridge performance, longer lifespan, and peace of mind on every trip.
RV Rooftop Refrigerator Vent Fan Benefits
Improved Cooling Efficiency
You want your fridge to keep food fresh, no matter where you park your RV. When you add a rooftop refrigerator vent fan, you boost the cooling power of your fridge right away. The fan pulls hot air out and helps cold air move around inside the fridge. This means your fridge can keep a steady temperature, even when the weather outside changes. You won’t have to worry about ice cream melting or milk spoiling because the fridge stays cold and reliable.
A high-quality fan, like the fanacdc RV Fridge Fan, makes a big difference. It helps your fridge work better in both the fridge and freezer sections. You get fewer temperature swings, which is important for keeping food safe. If you travel in cold weather, you’ll notice your fridge keeps the freezer cold enough for frozen foods. That’s a big win for anyone who loves to stock up before a long trip.
Tip: A steady fridge temperature means less food waste and fewer trips to the store.
Enhanced Durability and Safety
You want a fridge fan that lasts as long as your adventures. The fanacdc RV Fridge Fan uses reinforced blades and a dual ball bearing system. This design stands up to bumps, vibration, and rough roads. You don’t have to worry about the fan breaking down in the middle of a trip. The fan also has IP54 or IP68 protection, so it keeps working even if there’s humidity or dust near your fridge.
Safety matters, too. The fanacdc RV Fridge Fan meets strict safety standards. You get peace of mind knowing your fridge stays cool without risk. The fan’s tough build means you spend less time fixing or replacing parts. You can focus on enjoying your trip instead of worrying about your fridge.
fanacdc Product Advantages
The fanacdc RV Fridge Fan stands out for its long lifespan and smart features. It runs for up to 50,000 hours, so you won’t need to replace it often. The fan works with a wide voltage range, so your fridge stays cool even if the power dips. You can customize the fan to fit your fridge, making installation easy.
Here’s a quick look at what you get:
| Feature | Benefit for Your Fridge |
|---|---|
| Long lifespan | Fewer replacements needed |
| Wide voltage range | Reliable cooling anytime |
| Reinforced blades | Handles vibration and shocks |
| IP54/IP68 protection | Works in tough environments |
| Custom fit options | Easy installation for any fridge |
When you choose the fanacdc RV Fridge Fan, you get a fridge that runs better, lasts longer, and needs less maintenance. You save money and avoid hassle. Your fridge stays cool, your food stays fresh, and your adventures stay on track.
Conclusion
You’ve just learned how to install an RV fridge fan step by step. Now, you know how easy it is to boost your fridge’s cooling power and keep your food fresh on every trip. When you use a high-quality fan like the fanacdc RV Fridge Fan, you get more than just cool air—you get peace of mind.
Let’s recap what you did:
- Gathered all the right tools and materials.
- Prepared your workspace and checked your power supply.
- Accessed the fridge vent safely.
- Mounted the fan for the best airflow.
- Wired everything up and tested your setup.
- Learned how to troubleshoot and maximize cooling.
Tip: If you ever get stuck, check the FAQ section for answers to common installation questions. You’ll find quick solutions for most issues.
Choosing the fanacdc RV Fridge Fan means you picked a product built for durability, safety, and long life. You don’t have to worry about vibration, voltage dips, or harsh weather. Your fridge will run smoother, last longer, and need less maintenance.
Here’s what you gain with fanacdc:
| Advantage | What It Means for You |
|---|---|
| Long lifespan | Fewer replacements |
| Wide voltage range | Reliable cooling |
| Tough build | Handles rough roads |
| Easy installation | Less hassle |
Ready for your next adventure? Follow this guide, and you’ll enjoy cold drinks, fresh food, and worry-free travel. For more tips, support, or to explore more cooling solutions, visit fanacdc’s official website.
Stay cool and safe travels!
You’ve got everything you need to install your RV fridge fan and keep your food cool. With fanacdc, you get a tough, reliable fan that makes every trip easier. If you have questions, check these common ones:
- What if the fan or speed controller doesn’t work?
- Can I mount the fan to the roof vent?
- How do I connect the fan to power?
- Where should I put the temperature sensor?
For more help, explore these support topics on the fanacdc website:
| Installation Topic | Description |
|---|---|
| Lower Fan Install | Improve Efficiency |
| Upper Roof-Vent Install | Blow Hot Air Out Roof Vent |
| Adjust Fan Setting | Change Temp Fan Runs At |
Stay cool and enjoy your adventures!
FAQ
How do I know if the fanacdc RV Fridge Fan fits my rv fridge?
You can check the mounting hole pattern on your fridge. The fanacdc RV Fridge Fan matches most rv models. If you have a unique setup, you can request a custom fit. This makes your diy project easier.
Can I install the fanacdc RV Fridge Fan in any rv cooling system?
Yes, you can use the fanacdc RV Fridge Fan in almost any rv cooling system. It works with 12V or 24V DC power. You get reliable performance in different rv environments.
What should I do if the fan doesn’t turn on after installation?
First, check your wiring and power supply. Use a multimeter to test voltage. Make sure you connect the fan to the correct rv power line. If you still have trouble, visit the fanacdc website for support.
Is it safe to mount the fan to the roof vent in my rv?
You can safely mount the fan to the roof vent in your rv. The fanacdc RV Fridge Fan handles vibration and road bumps. Secure it with screws or zip ties. Always check that the blades spin freely.
Can I add a temperature sensor or speed controller to my rv fridge fan?
Yes, you can add a temperature sensor or speed controller to your rv fridge fan. The fanacdc RV Fridge Fan supports these features. You can customize your diy setup for better cooling and energy savings.