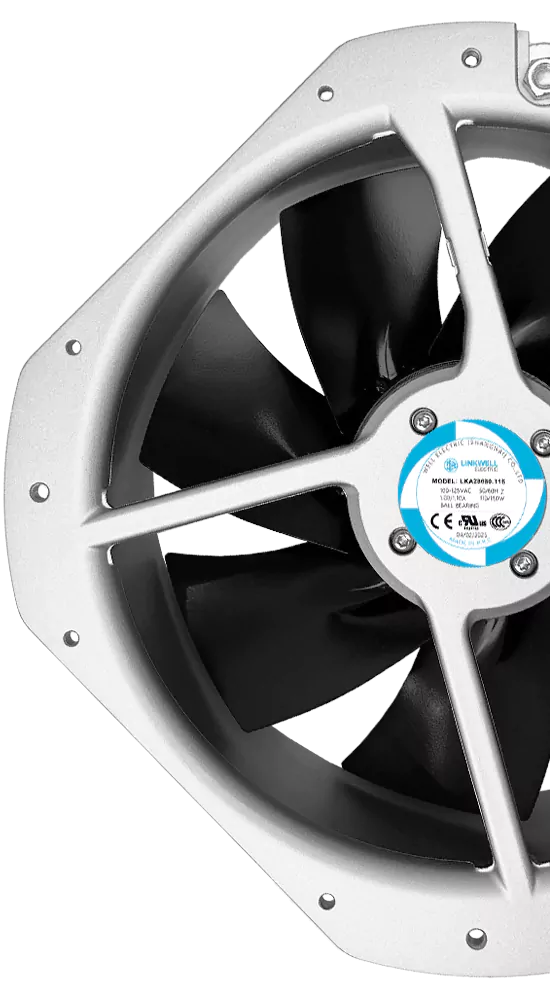
A cabinet fan can keep running while its cooling performance quietly disappears. As dust loads the filter, pressure drop rises and airflow falls. The fan may still sound normal, but the cabinet temperature begins to climb and hot spots form around drives, power supplies, PLCs, and other heat-producing components.
Replace the filter when it can no longer provide acceptable airflow or contamination control – not simply because a fixed number of days has passed. Your maintenance decision should combine visual condition, airflow, temperature trend, operating environment, and the filter manufacturer’s instructions.
Key Takeaways
- Do not replace a cabinet fan filter by calendar alone. Use temperature, airflow, pressure, and visible condition to set the interval.
- Inspect both the intake mat and the exhaust grille. Either side can restrict the cooling path.
- Use the specified media, thickness, and dimensions. A mat that merely fits can change airflow and filtration performance.
- Do not wash, vacuum, or blow out a filter unless the manufacturer approves that method for the exact media.
- Record temperature before and after service. The trend tells you whether filter loading was the real cause.
- If replacement does not restore cooling, investigate the fan, airflow path, heat load, vents, and ambient temperature.
When Does a Cabinet Fan Filter Need Replacement?
A dark or dusty filter is a warning, but color alone does not define the end of service life. Fine dust can block airflow before the surface looks completely covered, while some visible particles may remain on the outer layer without causing a critical pressure increase. Look for several signals together.
| Condition | What It Tells You | Recommended Action |
|---|---|---|
| Cabinet temperature is rising under the same load and ambient conditions | Cooling airflow may have fallen | Inspect the filter, fan, outlet, and internal airflow path |
| Airflow at the exhaust is noticeably weaker | The filter or outlet may be restricted | Measure if possible and replace loaded media |
| Filter media is torn, deformed, or no longer seated correctly | Unfiltered bypass leakage is possible | Replace the filter immediately and inspect the frame |
| Filter is wet, oily, or chemically contaminated | Filtration and pressure drop are no longer predictable | Replace it and identify the contamination source |
| Dust is appearing inside the cabinet | Media, gasket, cover, or positive pressure may be inadequate | Inspect the complete intake and sealing arrangement |
| Fan noise changes or vibration increases | Dust may have reached the impeller or the fan may have a mechanical problem | Inspect the fan separately; a new filter may not solve the fault |
How Often Should You Inspect the Filter?
There is no reliable universal replacement interval for every control panel. A clean electrical room and a woodworking shop can load the same filter at very different rates. Operating hours, particle size, oil mist, humidity, seasonal dust, cleaning practices, and fan duty cycle all change the result.
For a new installation, set a conservative initial inspection interval and record what you find. A practical approach is to inspect after the first few weeks of normal operation, then lengthen or shorten the interval based on temperature, visible loading, and airflow. If your cabinet has temperature logging or a differential-pressure indicator, use the trend rather than relying only on the calendar.
Keep the inspection conditions comparable. A higher cabinet temperature may come from a warmer room or increased equipment load rather than the filter. Compare internal temperature, ambient temperature, and operating load before you attribute the change to airflow.
Before You Open the Fan Filter
Electrical cabinet work must follow your site’s lockout/tagout procedure and the equipment manufacturer’s safety instructions. A fan stopping does not prove that every circuit inside the cabinet is de-energized. Only qualified personnel should open or service equipment where hazardous voltage or moving parts may be accessible.
Prepare the correct replacement media before you start. Verify:
- Fan filter series and exact model
- Filter dimensions and thickness
- Media grade or approved part number
- Any directional marking
- Required protective equipment and cleaning method
- Whether the filter is replaceable, cleanable, or single-use
- Condition of the cover, gasket, and retaining clips
A filter that physically fits is not necessarily equivalent. Different media can change dust retention, pressure drop, airflow, flammability performance, and the installed protection rating.
Cabinet Fan Filter Replacement: Step by Step
- Record the operating condition. Note the ambient temperature, cabinet temperature, equipment load, alarms, and any available airflow or pressure reading. This gives you a baseline for the final check.
- Isolate the equipment safely. Follow the approved shutdown and lockout/tagout procedure. Confirm the required absence of voltage using the method specified by your site.
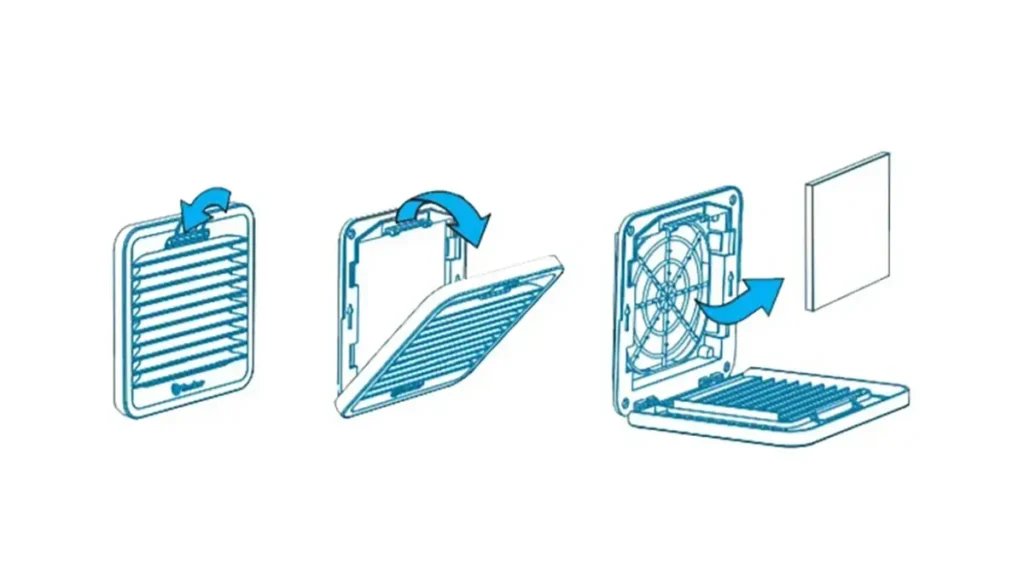
- Open the fan filter cover correctly. Use the release points shown in the product instructions. Do not pry against the panel or force clips that may be hidden by dust.
- Remove the used filter carefully. Avoid shaking accumulated dust into the cabinet. Place contaminated media in an appropriate bag or container, especially when the dust may be conductive, irritating, or process-related.
- Inspect the filter housing and fan. Check the grille, retaining features, gasket, wiring, impeller, and nearby cabinet surface. Look for bypass trails that indicate air has been entering around the media or frame.
- Clean the housing without driving dust inward. Use the approved vacuum or wiping method for the contaminant and equipment. Protect internal components. Do not direct uncontrolled compressed air through the cabinet.
- Install the correct replacement media. Seat it evenly without folds, gaps, or compressed edges. Follow any airflow-direction marking and make sure the cover closes fully.
- Inspect the outlet filter. An open intake with a blocked exhaust still produces poor airflow. Replace or service the exhaust media when its condition requires it.
- Restore power under the approved procedure. Confirm fan rotation, airflow direction, unusual noise, current, and alarms.
- Verify the result. Compare exhaust airflow and cabinet temperature with the baseline under similar load. Record the replacement date, part number, and observations.
Should You Clean the Filter or Replace It?
Follow the instructions for the exact media. Some filter materials may support a defined cleaning method, while others lose structure or filtration performance when washed, brushed, or exposed to compressed air. Cleaning can also push fine particles deeper into the media instead of restoring the original pressure drop.
Replace the filter if it is torn, permanently deformed, wet, oily, chemically attacked, or still restrictive after an approved cleaning process. Replacement is also the safer choice when you cannot confirm that the media is reusable.
Do not treat compressed air as a universal maintenance solution. It can spread hazardous dust, damage fibers, create a false impression of cleanliness, and contaminate components inside the cabinet. If compressed-air cleaning is permitted, the method, pressure, direction, containment, and personal protection should be defined by the applicable product and site instructions.
Why a New Filter May Not Restore Cooling
If cabinet temperature remains high after replacement, check the rest of the airflow system. Common causes include:
- An exhaust filter that is still blocked
- A fan running in the wrong direction
- A failed fan, low supply voltage, or incorrect frequency
- Wiring bundles or internal plates blocking the intended path
- Air short-circuiting directly from intake to exhaust
- Heat load increasing beyond the original design
- Ambient air becoming too hot for open-loop ventilation
- Door gaps or missing seals preventing useful positive pressure
- A replacement media specification with excessive pressure drop
You may need to recalculate the required airflow and review the fan operating point. LINKWELL’s electrical enclosure cooling guidance can help you place the maintenance issue within the wider thermal design.
Build a Maintenance Record That Helps You Predict Failure
Record the filter part number, installation date, removal date, visible contamination, ambient temperature, cabinet temperature, and any airflow or pressure reading. After several cycles, you can see whether loading is seasonal, tied to a production process, or caused by a change in the surrounding area.
If one cabinet loads filters much faster than similar units, do not simply shorten its interval. Check its position, door sealing, intake orientation, process dust source, fan speed, and pressure balance. The filter may be exposing a layout or environmental problem.
Choosing the Correct LINKWELL Replacement
LINKWELL’s LK32, LK66, FK55, and FF fan filter families use serviceable filter arrangements, but the correct media and opening method depend on the selected series. Send the original model, filter dimensions, photographs of the housing and label, operating environment, and required protection level when requesting a replacement.
If the original filter fan no longer meets your airflow or protection requirement, provide the cabinet cutout, voltage, heat load, temperature limits, and outlet arrangement so the whole system can be reviewed. Contact LINKWELL with your cabinet fan filter details rather than selecting by outside dimensions alone.
Clean, Replace, or Investigate?
| What you find | Best next action | Reason |
| Surface dust, normal temperature, and airflow close to the clean baseline | Keep the filter in service and shorten the next inspection interval if dust is increasing | Appearance alone does not prove that the pressure drop is excessive |
| Loaded or damaged media, rising cabinet temperature, or clearly reduced airflow | Replace the filter with the specified media and record the result | A new mat restores the intended flow path and filtration characteristics |
| Oily, wet, deformed, torn, or poorly seated media | Replace it and correct the source, fit, gasket, or installation issue | The problem is not normal dry-dust loading |
| New filter fitted but temperature remains high | Investigate the fan, outlet, heat load, airflow path, ambient temperature, and controls | Repeated filter replacement will not repair another cooling-system fault |
Some media can be cleaned; some cannot. If the exact product instructions do not approve washing, vacuuming, or compressed air, treat the element as replaceable. Compressed air can tear fibers, open invisible channels, drive contamination into the cabinet, or create a filter that looks clean while no longer performs as specified.
How Filter Loading Changes the Fan Operating Point
As dust accumulates, the filter pressure drop rises. The fan does not normally continue to deliver its free-air rating against that extra resistance. Its operating point moves along the fan curve, so the actual airflow falls. The internal temperature may then rise even though the fan still sounds normal and the blades are turning.
This is why a visual inspection works best when you combine it with at least one trend: cabinet temperature at a repeatable load, air velocity at a defined location, differential pressure across the intake, fan current, or a controller alarm. If you are still sizing the system, use the method in how to size a cooling fan for an electrical cabinet and include a realistic allowance for filter loading rather than selecting exactly at the clean-filter requirement.
A dirty exhaust grille can have the same effect as a dirty intake mat. Inspect the full path and confirm that cables, drawings, packaging, or newly installed components have not blocked the outlet. The airflow route should still carry cool air past the heat-producing equipment; our cabinet fan airflow direction guide covers this layout in more detail.
Set a Condition-Based Maintenance Interval
You need an initial schedule, but you should let site evidence refine it. Begin with a conservative inspection interval based on dust concentration, operating hours, process type, season, and the consequence of overheating. Then record the same information at each service:
- Date, machine hours, and production condition
- Ambient temperature and cabinet temperature at a comparable load
- Filter condition, including oil, moisture, insects, fiber damage, or bypass gaps
- Airflow, differential pressure, or another repeatable condition indicator
- Whether the filter was kept, replaced, or the cooling system required further work
- Temperature or airflow after the service action
After several cycles, you can set an interval that reflects the actual site instead of a generic number. For example, a woodworking plant may require much shorter inspection periods than a clean electrical room. Seasonal pollen, textile lint, metal dust, and oil mist can also produce different failure patterns. A thermostat or temperature alarm can help you detect deterioration between inspections, but it should not replace physical checks. See enclosure temperature control for monitoring options.
Plan Spare Filters for OEM and Maintenance Programs
If you build or maintain multiple cabinets, standardize the fan-filter model and replacement-media code where the application allows. Record the cutout, frame size, media material, thickness, protection requirement, and approved supplier reference in the bill of materials. A label inside the door helps a technician select the correct part years later.
Stock enough filters to cover the delivery lead time plus the expected consumption at your dustiest sites. Store them flat, dry, clean, and protected from ultraviolet light, oil, and deformation. Do not mix similar-looking mats without checking their specification. A denser substitute may reduce airflow; a more open substitute may increase contaminant entry.
During replacement, isolate the cabinet according to your electrical safety procedure, clean the frame and sealing surface without pushing debris inside, install the mat in the specified orientation, and close the cover evenly. After restart, confirm fan rotation, airflow direction, unusual noise, and temperature response. If the result is still outside your limit, step back and diagnose the entire cooling system rather than fitting another new filter.
Frequently Asked Questions
Can I run the cabinet temporarily without a filter?
That may restore airflow but allows unfiltered contaminants into the enclosure and can change the intended protection and pressure balance. Follow your equipment risk assessment and replace the media with the approved part instead of treating filter removal as a normal operating solution.
Can I wash a cabinet fan filter?
Only when the exact filter documentation permits washing and defines the method. Replace media that is not identified as reusable or that remains damaged, contaminated, or restrictive after approved cleaning.
Why is the cabinet still hot after filter replacement?
Check the exhaust filter, fan direction, fan condition, supply voltage, internal obstructions, increased heat load, and ambient temperature. A filter replacement cannot correct a fan or system-sizing problem.
Do I need to replace the intake and exhaust filters together?
Inspect both. They do not always load at the same rate, but either one can limit the operating airflow. Replace each according to its measured or observed condition and approved maintenance criteria.
What information identifies the correct replacement filter?
Use the fan filter manufacturer, complete model, filter part number, dimensions, media specification, protection requirement, and housing photographs. Do not rely on nominal fan size alone.