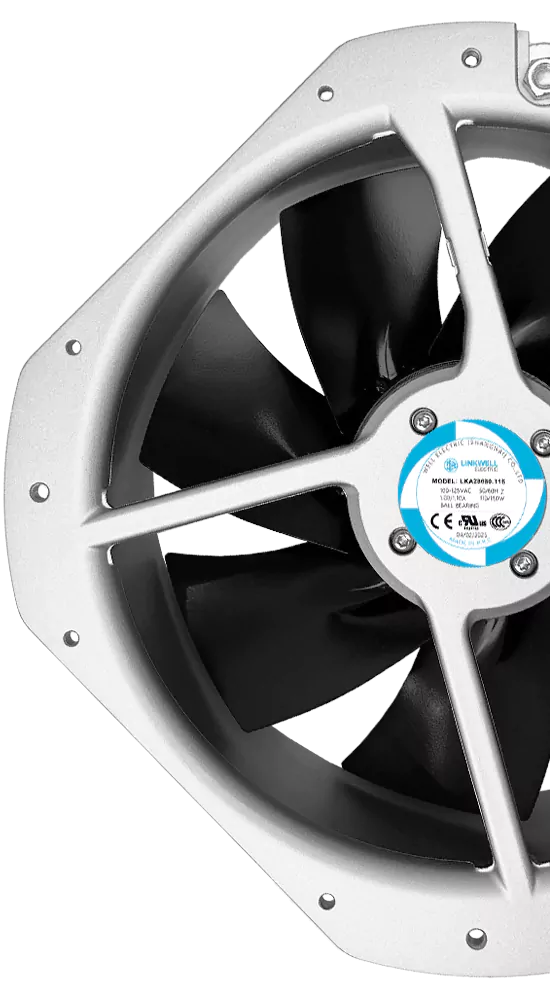
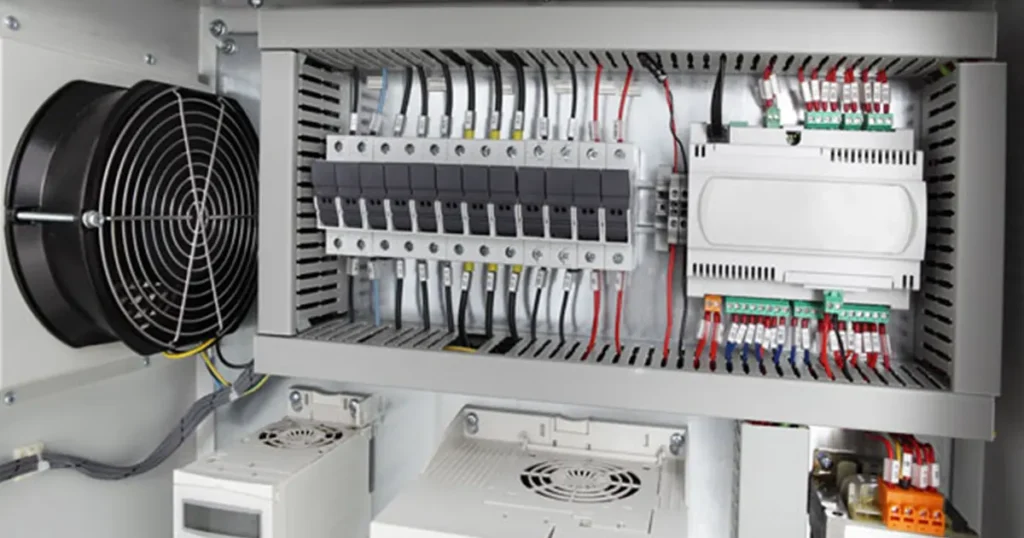
A cooling fan can meet its catalog curve and still fail inside your equipment because the inlet is too close to a wall, cable bundle, filter or heat exchanger. The fan sees a distorted approach flow, not the smooth laboratory inlet used to produce the published curve.
There is no universal clearance that is correct for every axial fan, centrifugal fan and enclosure. A useful answer must account for fan diameter, inlet geometry, direction of approach, opening free area and the restriction created by nearby components.
First, define which inlet clearance you mean
Fan inlet clearance usually means the free distance between the fan’s suction side and the nearest wall, filter, coil, grille or other obstruction. This spacing lets air approach the inlet from enough area and with reasonable uniformity.
The same phrase is also used in centrifugal-fan manuals for the small radial gap or axial overlap between an impeller and its inlet cone. That is a manufacturing and mechanical-safety dimension. It is model-specific and may be only a few millimeters. It must never be substituted for the external space required in front of the fan.
| Clearance | Measured between | Purpose | Who defines it |
|---|---|---|---|
| External inlet clearance | Fan inlet and nearby system component | Allow airflow to enter with limited restriction and distortion | Equipment designer, guided by fan instructions and test results |
| Wheel-to-inlet clearance | Rotating impeller and stationary inlet ring or cone | Maintain aerodynamic geometry and prevent contact | Fan manufacturer |
| Safety clearance | Rotating parts and guards or equipment structure | Prevent access and mechanical contact | Product design, standards and risk assessment |
| Service clearance | Fan and removable panels, connectors or tools | Allow inspection and replacement | Equipment designer and service plan |
Why a blocked inlet changes fan performance
A fan curve is produced with a defined test airway. The inlet is arranged to give the fan a controlled approach flow. Your equipment rarely looks like that. A wall close to the inlet forces air to turn sharply and accelerate through a narrow side gap. A partial obstruction feeds one section of the blade while starving another.
The immediate result can be lower airflow at the same speed. The operating point moves because the added inlet loss becomes part of the system resistance. The velocity profile may also become nonuniform or develop swirl, so the loss cannot always be represented by a simple clean pressure-drop value.
Uneven blade loading can create tonal noise, vibration and fluctuating motor load. Increasing fan speed may recover some airflow, but it also increases power and acoustic output. Under the fan laws, a modest speed increase can produce a much larger power increase when the system remains geometrically similar.
AMCA calls the performance loss caused by poor inlet or outlet conditions system effect. Its guidance identifies inlet obstructions, uneven flow, swirl and poorly configured ductwork as common causes. Catalog performance does not include every system-effect penalty that can occur in a compact product.
The fan may therefore appear weak even though it is operating normally. Before changing the fan, compare the installed airflow with a test that temporarily removes or moves the nearby obstruction. A large improvement points to the layout, not the motor.
How much fan inlet clearance should you allow?
Use the exact model’s installation instructions whenever they give a minimum. Large axial and plenum fans often express spacing as a multiple of impeller diameter, D. Compact electronic-cooling fans may instead rely on a product drawing and require the equipment maker to validate the final enclosure.
Published minimums vary because fan construction and inlet geometry vary. A diameter multiple from one installation manual should not be transferred to a different fan or enclosure. Use the instructions for the exact model; if no minimum is published, treat any rule of thumb only as a screening value and validate the production assembly.
| Situation | Design response |
|---|---|
| The manufacturer states a minimum clearance | Meet it and preserve the specified inlet device, orientation and guard |
| No clearance value is published | Start with the largest practical spacing, check available entry area and validate the assembly |
| An obstacle covers only one side of the inlet | Move it, center it, add a flow guide or test for tonal noise and lost airflow |
| Space is less than the recommended value | Do not apply a generic derating factor; measure the actual operating point and temperatures |
| Several fans share a plenum | Check spacing between inlets, plenum uniformity and behavior with one fan stopped |
A diameter multiple is useful for screening the layout, but it is not acceptance evidence. The thermal test should include the production guard, filter, wiring and internal components.
If you have room to increase only one dimension, first remove localized blockage near the blade-tip region and improve symmetry. An extra 20 mm on one side may help less than moving a cable bundle that blocks a quarter of the inlet.
A quick open-area check for a fan facing a flat wall
When a circular fan inlet of diameter D faces a flat wall at a uniform gap g, air has to enter through the cylindrical area around the perimeter. A simple geometric estimate for that side-entry area is:
Aside is approximately pi x D x g
The circular face area is:
Aface = pi x D^2 / 4
Setting those two ideal areas equal gives g = D/4. For a 120 mm diameter opening, that is 30 mm. This does not prove that 30 mm is sufficient. It only tells you that a smaller gap provides less gross side-entry area than the fan face before you account for a guard, hub, nearby walls, corner blockage and turning loss.
For a square fan, use the effective open perimeter and actual inlet opening rather than the outer frame dimensions. If one or more sides are blocked, subtract those lengths from the available perimeter. A fan mounted in a corner may have much less entry area than the nominal gap suggests.
Keep the limitations visible:
- equal area does not mean equal pressure loss;
- air must turn into the fan, so sharp-entry losses remain;
- the velocity is not uniform around the perimeter;
- guards, filters and structure reduce net free area;
- the fan’s hub and blade sweep do not use the face area uniformly.
Use the calculation to identify obviously choked geometry. Then use the fan curve and prototype measurements to decide whether the layout is acceptable.
Clearance near filters, heat exchangers and grilles
A filter or heat exchanger is not the same as a solid wall. Air can pass through it, but the component creates pressure loss and may deliver a nonuniform velocity profile to the fan. Spacing gives the flow a chance to redistribute; it does not erase the component’s resistance.
If the fan is placed close to a filter, compare clean and loaded-filter pressure drop at the required airflow. Dust loading can move the operating point far enough that a free-air fan no longer provides useful flow. The fan-filter airflow calculation should use the intersection of both curves, not the fan’s free-air rating.
For heat exchangers, check whether headers, return bends or frame rails block a sector of the fan. Multiple fans across one coil need enough plenum depth or spacing to avoid strong dead zones. Measuring average coil-face velocity can reveal that total airflow is acceptable while one region receives very little cooling.
Grilles and guards should be assessed with their pressure-drop data at the intended flow. A value such as “70% open area” is useful but incomplete because wire shape, louver angle and distance from the blade affect loss and noise. A guard positioned close to the blade can also generate blade-passing tones.
Decide whether the fan pushes or pulls through the component. Pull-through layouts may produce more even flow across a heat exchanger, while push-through layouts may suit other packaging constraints. The correct arrangement depends on component geometry, temperature exposure, service access and the fan’s allowable environment.
Inlet layout mistakes to catch in the CAD model
CAD often shows that parts do not collide, but it does not show whether air can reach the inlet. Add an airflow review to the mechanical design check.
| Layout issue | Likely symptom | Useful correction |
|---|---|---|
| Wall parallel to and very close to the fan face | Lower airflow and higher inlet loss | Increase gap, enlarge side openings or use a ducted inlet |
| Cable bundle across one quadrant | Tonal noise and uneven blade loading | Reroute and restrain cables outside the swept inlet region |
| Solid component centered over the motor but extending into blade sweep | Unexpected pressure loss | Reduce its diameter or increase axial spacing |
| Fan mounted in an enclosure corner | Entry available from only two sides | Move the fan, add larger vents or form a dedicated inlet plenum |
| Filter frame smaller than fan inlet | High face velocity and short filter life | Increase filter area or use a transition plenum |
| Open gap between fan frame and panel | Discharge air recirculates to inlet | Add a gasket or sealed adapter |
| Two parallel fans without separation | Crossflow through a stopped fan | Validate failure mode; add isolation or control measures if required |
Do not overlook the outlet. A clear inlet cannot compensate for a discharge placed against a wall or an abrupt turn. Both sides influence the system curve, and poor discharge conditions can reflect noise and turbulence back through the fan.
The article on axial fan noise reduction covers additional layout changes that can reduce interaction tones without simply lowering speed.
How to validate a tight fan installation
Build the production-intent airflow path, not an open-bench approximation. Install the real grille, guard, filter, heat exchanger, gasket, cable harness and covers. Run at the expected voltage and control command.
Measure a baseline with the intended clearance. Then test one or two larger clearances if the prototype allows it. Record fan speed, input current or power, pressure difference, airflow where practical, and temperatures at the critical components. If airflow measurement is difficult, temperature rise under a repeatable heat load can still show whether the layout change is meaningful.
Test at the difficult conditions: maximum heat load, high ambient temperature, minimum allowed supply voltage, dirty-filter resistance and any low-noise speed limit. Let temperatures reach steady state or follow a defined transient acceptance method.
Listen for more than overall dBA. Record narrow tonal noise, beating between multiple fans, vibration and control instability. A fan that surges or hunts because the control system reacts to a distorted temperature signal may need a control change as well as more space.
For a risk-sensitive product, repeat with common faults: a blocked vent, disconnected control lead, failed fan in a parallel array and partially installed filter. The goal is not to prove that the fan spins. It is to show that the equipment remains within component limits or enters a defined protective state.
What to put on the fan installation drawing
Dimension the clearance from a named reference surface on the fan drawing to the nearest permitted obstruction. Add a keep-out zone over the inlet rather than relying on a note that manufacturing may miss.
Show the required panel cutout, gasket boundary, fastener torque where relevant, airflow direction and connector orientation. Identify allowed components inside the keep-out zone, such as a specified guard, and prohibit cables or labels that can be drawn into the inlet.
If the fan requires an inlet ring, bellmouth or wall ring, call out the exact part or geometry. Do not let a prototype’s smooth inlet be replaced in production by a sharp-edged opening without review.
Include inspection points for:
- minimum inlet and outlet clearances;
- guard and filter part numbers;
- fan-to-panel sealing;
- cable restraint and connector locking;
- blade freedom before power-up;
- airflow direction;
- speed or alarm feedback after startup.
Link these dimensions to the validation report and revision. If an internal component moves closer to the fan later, the change-control process should trigger a thermal review rather than treating it as a harmless packaging update.
FAQ
What is the minimum clearance in front of a cooling fan?
There is no universal minimum. Use the fan manufacturer’s installation instructions. Where none is available, check entry area and obstruction symmetry, allow the largest practical space, and validate the production assembly.
Is one fan diameter of inlet clearance enough?
It may be enough for some fan and enclosure combinations, but it is not a universal acceptance limit. Follow the instructions for the exact fan model and confirm airflow, noise and component temperatures in the final assembly.
Can a fan be mounted directly against a filter?
It can be physically possible, but close spacing may create nonuniform loading, extra noise and reduced airflow. Check the fan and filter manufacturers’ instructions, pressure drop and prototype temperature distribution.
Does a larger inlet clearance always increase airflow?
Airflow usually stops improving once the inlet condition is no longer the dominant restriction. Beyond that point, more space may help service access but provide little aerodynamic benefit.
How do I know the inlet is too restricted?
Compare airflow, pressure, speed, current, noise and temperatures with the obstruction moved farther away. A repeatable improvement indicates that the original layout imposed a meaningful inlet penalty.
Is fan inlet clearance the same as blade-tip clearance?
No. Inlet clearance is usually external system space. Blade-tip or wheel-to-inlet clearance is a model-specific mechanical dimension inside the fan assembly and must follow the manufacturer’s drawing.